
So far, in this series about the IBM Data Studio integrated development environment (IDE) that’s available with DB2 Version 9.5 (DB2 9.5), I’ve shown you how to set up database connection objects and the actions that you can perform on them. In addition, I introduced you (in Part 2) to some of the features available in the Database Explorer view, and Part 3 and Part 4 gave you a full tour of overview diagrams. In Part 5, you learned how to point-and-click your way to OLE DB functions that can integrate data from external data sources that have an OLE DB provider. In Part 6, I showed you how easy it is to create an SQL statement using the IBM Data Studio SQL Builder. I used Part 7 to take your SQL development capabilities to a whole new level by introducing you to my favorite SQL Builder features; namely SQL Assist, Content Tip, colorization, and the design-time parser, and in Part 8 we looked at the rest of the SQL Builder features.
I concluded my last article by noting that you can write SQL using both the SQL Builder and SQL Editor; however, the more experienced you get at writing SQL, the more likely you will gravitate to using the SQL Editor. Although these two editors may eventually converge, you should be aware of the current differences between these two editors. In this installment, I touch on these differences by showing you the capabilities of the SQL Editor in more depth.
Things you have to do to follow the examples in this article…
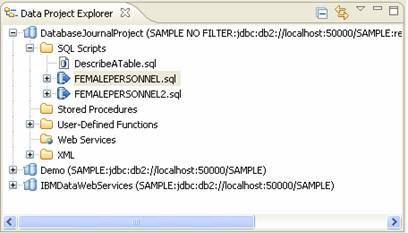
I recommend that you start with Part 1 because I build on the concepts and objects created in this series sequentially. For this article, I assume that you’ve created the FEMALEPERSONNEL SQL statement created in previous installments of this series.
Exploring the SQL Editor
In this section, I’ll show you the features of the SQL Editor that improve productivity. Features that I’ve already discussed in articles covering the SQL Builder (Content Assist, Content Tip, colorization and design parsing) are all available in the SQL Editor so I won’t cover them here. In addition, since I covered templates in Part 8, I won’t cover those here either.
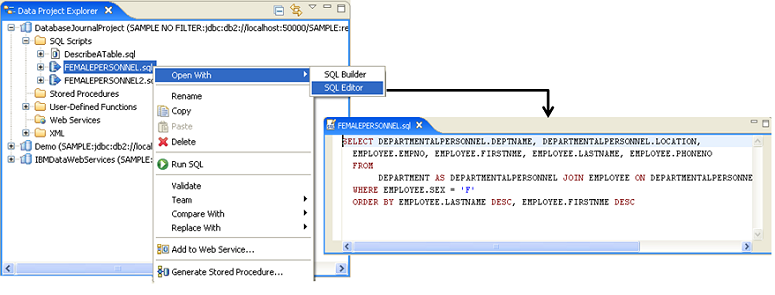
To work through the examples in this section, open the FEMALEPERSONNEL SQL statement using the SQL Editor option from the right-click menu as shown below:
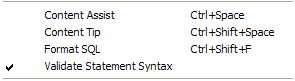
When you right-click within the SQL Editor you will see a pop-up similar to this:
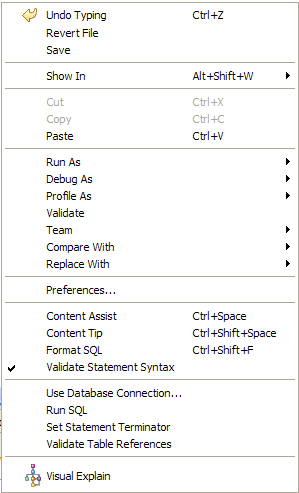
Note: Several of these options, such as Content Assist, Content Tip, Undo Typing, Cut, Copy, Paste, and Save, aren’t covered in this article, either because I have covered them in previous articles or because they are self-explanatory.
Revert File
Revert File will undo all the changes you’ve made in the current editing session. Its function is similar to the Revert to Template option that I covered in Part 8, but instead of reverting to a template, it reverts to the state of the file before you made any changes. Theoretically, Undo Typing can get you back to this state; however, the undo option has a cache that limits the amount of work you can undo. From my experience, you hit that limit when you need it the most, so Revert File is a great safety net to get you back to where you started. In addition, if I’ve made ten changes to my SQL statement since it was last saved, instead of selecting this option ten times (or using the shortcut Ctrl+Z [Undo] ten times), I can undo all ten changes at once with Revert File.
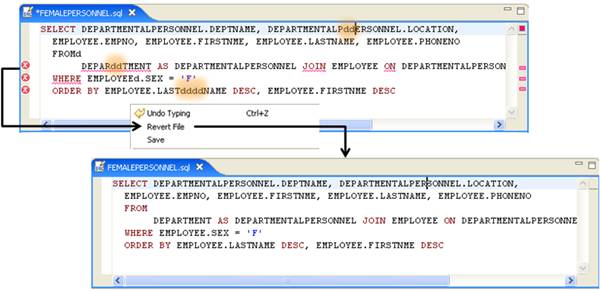
Notice in the previous figure that the asterisk (*) designating that the file has changed is removed after this action. This is because the file was reinstated to its last saved state.
Format SQL
The Format SQL option takes an SQL statement and formats it with line breaks and indentation. As you might expect, this option can make your SQL more readable with its built-in best practices for SQL readability; even if you don’t appreciate this function, the folks who have to read and work with your SQL statements will.
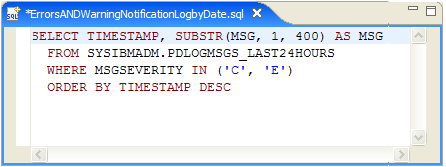
For example, copy and paste the following SQL statement into a new SQL statement called ErrorsANDWarningNotificationLogbyDate:
 SELECT TIMESTAMP, SUBSTR(MSG,1,400) AS MSG FROM
 SYSIBMADM.PDLOGMSGS_LAST24HOURS WHERE MSGSEVERITY IN (`C´,´E´)
 ORDER BY TIMESTAMP DESC
This query shows any errors or warning messages written to the notification log; it’s useful because it prevents database administrators (DBAs) from having to find this log and open it up with an ASCII editor to read it.
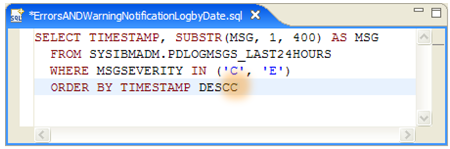
Your SQL Editor should look similar to this:

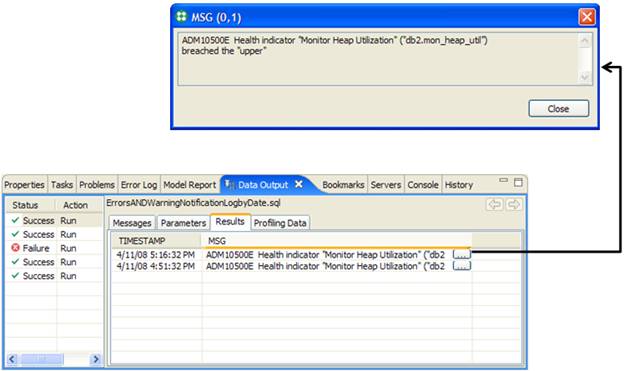
Run this query by right-clicking anywhere within the SQL Editor and select the Run SQL option. You can see the results of this query in the Data Output view. You can see the full message from the notification log by clicking the ellipses (![]() ). As you can see, my DB2 data server has breached an upper threshold for the utilization of the monitor heap:
). As you can see, my DB2 data server has breached an upper threshold for the utilization of the monitor heap:
Note: If you experience an error after pasting this SQL statement into the SQL Editor, it may have to do with the way your operating system copies and pastes text. I found that when I copied and pasted this SQL statement into IBM Data Studio, the operating system didn’t preserve the quotation marks properly: ![]() . This makes the query fail with the following error: SQLSTATE 42703: An undefined column, attribute, or parameter name was detected.
. This makes the query fail with the following error: SQLSTATE 42703: An undefined column, attribute, or parameter name was detected.
To get this query to run, I had to manually erase the quotation marks around the two variables, C and E, and retype them such that the SQL statement looked like: ![]() . You can see that the SQL Editor is able to parse these input variables by the fact that their color changes when you retype the quotation marks.
. You can see that the SQL Editor is able to parse these input variables by the fact that their color changes when you retype the quotation marks.
If you right-click in the SQL Editor and select the Format SQL option, the IBM Data Studio will change this SQL statement from a single line to the following statement:
You can see that IBM Data Studio inserted line breaks into this SQL statement for every major SQL keyword.
Validate statement syntax
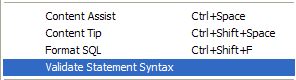
The SQL Editor can dynamically validate the syntax of your SQL statements, but you must first enable it to do so. When this option is enabled, a check mark (![]() ) appears beside it in the pop-up menu:
) appears beside it in the pop-up menu:
To see how this option works, right-click in the SQL Editor’s window and select the Validate Statement Syntax option. Disable this option by removing the check mark beside it:
After disabling this option, introduce an error to the ErrorsANDWarningNotificationLogbyDate SQL statement by adding an extra C to the DESC keyword:
When Validate Statement Syntax isn’t enabled, you will see no visual clue that your SQL statement contains an error; indeed, if you ran this SQL statement as is, you would receive the following error message: SQLSTATE 42601: A character, token, or clause is invalid or missing.
Now enable this option and look at the SQL Editor, which should now look similar to this:
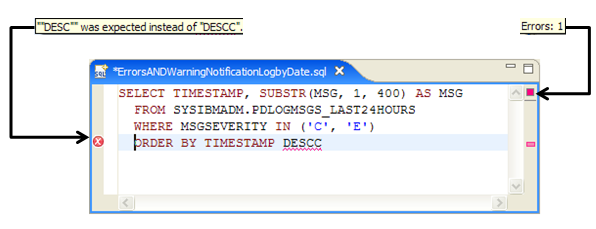
When statement syntax validation is enabled, the SQL Editor gives a number of visual cues when an error exists in your SQL statement. First, note the red ‘squiggly’ below the DESCC keyword (![]() ). This is the first indicator that an error exists in your SQL statement. In the SQL Editor’s right margin is a column indicator (
). This is the first indicator that an error exists in your SQL statement. In the SQL Editor’s right margin is a column indicator (![]() ) that tells you there is an error exist on a specific line of your SQL statement. In the top-right margin is an aggregate error counter (
) that tells you there is an error exist on a specific line of your SQL statement. In the top-right margin is an aggregate error counter (![]() ) for your entire SQL statement. In this example, since there is just one error, hovering over this marker displays Errors: 1. If you had multiple errors in your SQL statement, the SQL Editor would have multiple column indicators and the appropriate aggregation for the number of errors in the statement:
) for your entire SQL statement. In this example, since there is just one error, hovering over this marker displays Errors: 1. If you had multiple errors in your SQL statement, the SQL Editor would have multiple column indicators and the appropriate aggregation for the number of errors in the statement:
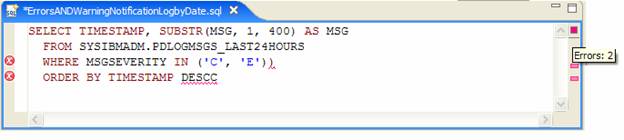
In the previous figure, you can see that there are two error column indicators, and the aggregate error counter now shows Errors: 2.
If you look at the left margin, you’ll see another error indicator (![]() ). This one provides hover help for the error in question. For example, if you hover over this icon, you can see that the SQL Editor expected the keyword DESC and not DESCC.
). This one provides hover help for the error in question. For example, if you hover over this icon, you can see that the SQL Editor expected the keyword DESC and not DESCC.
I recommend that you always enable this option; as you can see, it gives you design-time feedback on the SQL statements developed in the SQL Editor. This is much better than finding out about them at run time!