
In the first part of this series, I showed you how to use Microsoft Access 2007 as a graphical front end to a back-end IBM DB2 data server. Specifically, I showed you how to implement linked tables and create an abstraction layer over those linked tables such that information workers can work with business artifacts directly without worrying about different naming conventions; all the while, the data resides in a DB2 data server and there is virtually no hit to productivity. In Part 2, I took the concept of linked tables a step further and showed you how to leverage Access 2007 and DB2 as an integration layer; in addition, I demonstrated some of the business rules that Access 2007 maintains when presenting DB2 data to information workers. In Part 3, you learned how to take the data stored in your DB2 data server and use Access 2007 to create reports. In this article, I’m going to show you how to build forms that run against DB2 data servers, further demonstrating how transparent a back-end DB2 data server is to an Access 2007 developer. Forms are the basis for most applications built with Access 2007 and allow for data retrieval and manipulation (assuming of course that the user has the privileges and rights to view and edit the data).
Before you start…
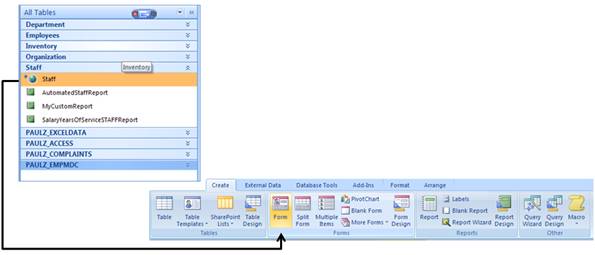
Make sure that you have linked the DatabaseJournalAccess2DB2 Access 2007 database that we created in Part 1 to the ORG, EMPLOYEE, STAFF, DEPT, and INVENTORY tables in the DB2 SAMPLE database. In addition, I assume you created an abstraction layer over those tables such that the All Tables view looks similar to the following figure. (Notice that the reports that were created in Part 3 are shown under the respective table from which they were built.)

The Form view: creating a simple form in Access 2007
If you want to create a basic form, we’re not talking about anything fancy here, perform the following steps:
1. From the All Tables pane, select the table for which you want to create a form. For this example, select Staff.
2. Select the Create tab and click the Form icon within the Forms section of the Office ribbon:
Access 2007 automatically creates a basic form that is bound to each column in the table:
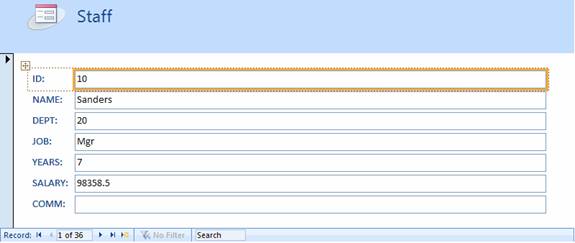
Now you can work with your form. The remainder of this part of the article will detail most of the actions you can perform within a generated form.
Access 2007 also automatically builds a navigation pane at the bottom of the form. You can use this pane to navigate all the data records in the form. For example, using the Record control at the bottom of this form ( ![]() ), you can traverse the data set. You can either directly enter the record number in the numerically bound text box (
), you can traverse the data set. You can either directly enter the record number in the numerically bound text box (![]() ) or navigate forwards and backwards (
) or navigate forwards and backwards (![]() ). For example, click Next Record (
). For example, click Next Record (![]() ) to move consecutively through the records in the STAFF table, starting with record 2:
) to move consecutively through the records in the STAFF table, starting with record 2:
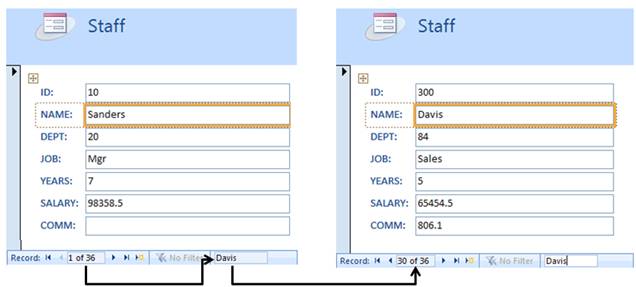
When you enter data in the Search field, Access 2007 navigates to the next record that contains the search keyword, no matter what column it appears in. For example, navigate back to the first record (![]() ) such that the form shows the Sanders record shown earlier in this article. Now enter the name Davis in the Search field to move to that record:
) such that the form shows the Sanders record shown earlier in this article. Now enter the name Davis in the Search field to move to that record:
The STAFF table (whose alias is Staff in the All Tables view and in the forms generated by Access 2007) has a total of 36 rows. If you try to navigate to the next row (![]() ) when you’re at the last record, Access 2007 will add a new row that will get persisted to the back-end database (in this case, the STAFF table in the SAMPLE database).
) when you’re at the last record, Access 2007 will add a new row that will get persisted to the back-end database (in this case, the STAFF table in the SAMPLE database).
You can also use the New (blank) record button (![]() ) in the navigation bar to add a new record no matter where you are in the data set. For example, navigate to record number 18 (ID will equal 180 and the Name field Abrahams).
) in the navigation bar to add a new record no matter where you are in the data set. For example, navigate to record number 18 (ID will equal 180 and the Name field Abrahams).
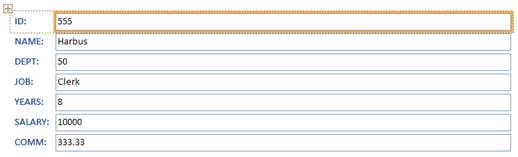
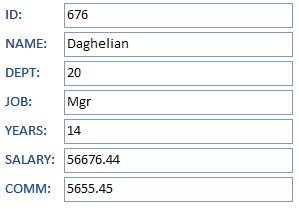
When a blank form is displayed, enter details for the new record; for example:
As you enter a new data record, you’ll see an icon that indicates that the record hasn’t yet been saved (![]() ); this icon is located in the top left corner of the form.
); this icon is located in the top left corner of the form.
To save the new record to the underlying table, press Ctrl+S. You will see the edit icon (![]() ) change to a row pointer icon (
) change to a row pointer icon (![]() ); you will also see that the number of records in the data set is 37 records instead of 36:
); you will also see that the number of records in the data set is 37 records instead of 36: ![]() .
.
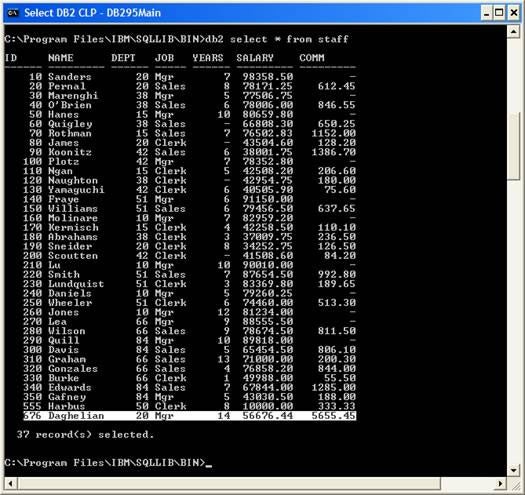
If you were to reopen the Staff table or access the table directly from the command line processor (CLP), you would see that the new record has been added to the data set. The following figure shows an example of directly accessing the underlying STAFF table using the DB2 CLP after making a change to the data using an Access 2007 form:
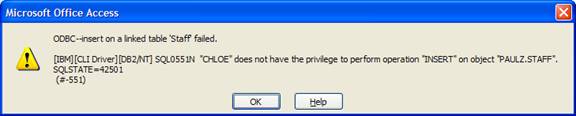
Of course, if you aren’t authorized to add data to a table, Access 2007 will return an error indicating that you don’t have the appropriate privilege to add a record to the table:
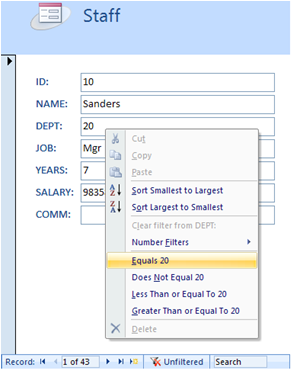
Access 2007 forms also offer powerful filtering capabilities. Look at the navigation pane in all of the examples so far in this article; notice that the No Filter field is disabled (![]() ). To filter a form on a column, simply select the column, right-click, and select a predefined filter (or define your own using the action menu bar). Notice that the number of records in the result set is now filtered (
). To filter a form on a column, simply select the column, right-click, and select a predefined filter (or define your own using the action menu bar). Notice that the number of records in the result set is now filtered (![]() ); you can verify this simply by looking at how many records the form now contains (
); you can verify this simply by looking at how many records the form now contains (![]() ):
):
To turn a filter off, just click the Filtered button, which changes to say “Unfiltered”; the button toggles between applying and not applying the defined filter to the result set. If you want to redefine the filter, right-click the column and specify a different filter.