


In my previous article “Adding Node for Existing SQL Server 2005 Failover Cluster“, I detailed the steps of how to add a new node for an existing SQL 2005 clustered instance that had been running for quite some time. This article continues the topic of how to apply a service pack and hotfix for the successfully added clustered nodes. It’s mandatory that all clustered nodes should be in synch in terms of version update.
- Pre-requisite: Checking Version Number and Download the Service Pack and Hotfix
- Step 1: Failover the SQL Clustered Instance to the Newly Added Node.
- Step 2: Pausing Old Clustered Nodes
- Step 3: Launch SQL Server 2005 Service Pack 2 Executable
- Step 4: Reboot Server
- Step 5: Launch SQL Server 2005 Cumulative Update Executable
- Step 6: Resume Paused Clustered Nodes
- Step 7: Test Cluster Failover
- What’s the Take Away?
- Conclusion
Pre-requisite: Checking Version Number and Download the Service Pack and Hotfix
First, we need to check the version of the Clustered SQL instance. You can quickly check the version of the clustered instance by simply connecting the SQL instance through SSMS.
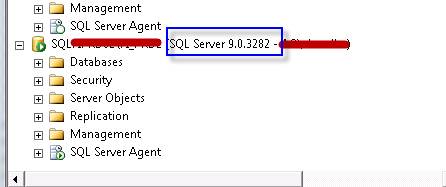
Check the version of the clustered instance
Version 9.0.3282 means SQL Server 2005 SP2 with CU9. In this case, we will need to patch the newly added node with SQL Server 2005 SP2 and then follow with the patching of cumulative update 9. You can download the service pack and cumulative update from Microsoft website.
Step 1: Failover the SQL Clustered Instance to the Newly Added Node.
Remote desktop onto the newly added node for the clustered SQL instance, open Cluster Administrator, then right click on the SQL Cluster Group, select Move Group, click on the newly added node under “Best Possible”
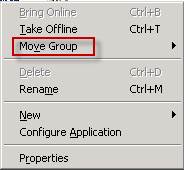
Select Move Group
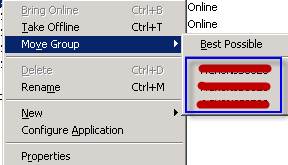
Click on the newly added node under “Best Possible”
Step 2: Pausing Old Clustered Nodes
Now the SQL Clustered instance is running on the newly added node. We can proceed with pausing the old nodes.
In this case, I have three clustered nodes for the SQL instance, two old nodes, say serverA and ServerB and one new node, say ServerC. Right click on ServerA and ServerB, select “Pause Node”. This step is very crucial, since you do not want to apply service pack and hotfixes onto the nodes that have been patched previously.
Select “Pause Node”
After you pause the old nodes, you will see something similar to the picture below. Again, to protect the privacy of the company, I need to mask the server name. You will see a warning sign on the servers you paused. We will not pause the newly added node, since we need to apply service pack and hotfix on the new node.
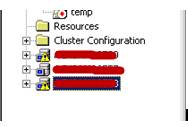
Pause the old nodes
Step 3: Launch SQL Server 2005 Service Pack 2 Executable
Right click on the SQL Server 2005 Service pack 2 executable, run the process with a domain login with administrative permission on the nodes that you are about to patch.

Run the process with a domain login with administrative permission
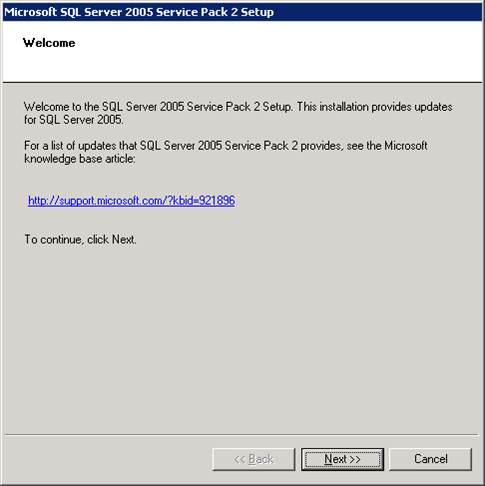
Microsoft SQL Server 2005 Service Pack 2 Setup Welcome page
The welcome page shows up and depicts the purpose of the executable, click Next to proceed.
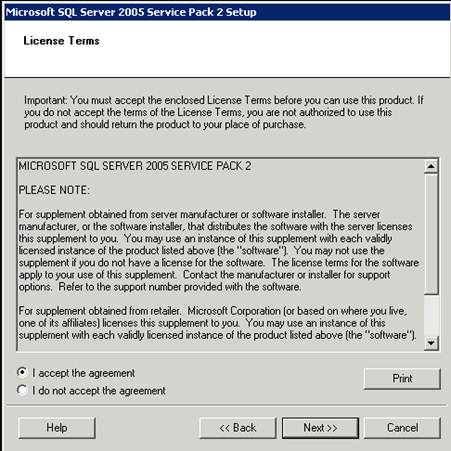
Microsoft SQL Server 2005 Service Pack License Terms
Standard License Terms agreement, Click “I accept the agreement” then click Next.
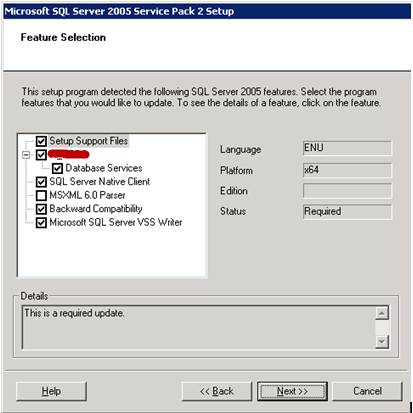
Feature Selection page
Feature Selection page –> The SQL instance name will be displayed on the masked portion. In this case, it’s a straightforward upgrade for database engine and SQL components. I would recommend updating all pre-selected components. Click Next.
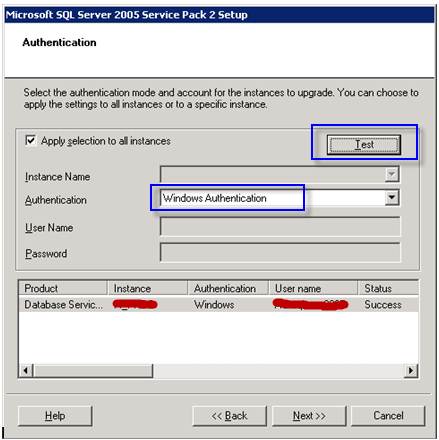
Windows Authentication
Authentication page –> you can choose to patch service pack by Windows Authentication or SQL Authentication. The default is Windows Authentication, the user name will default to the login used to launch the service pack 2 executable, you can test the connection of the login by click Test. Click Next to proceed…
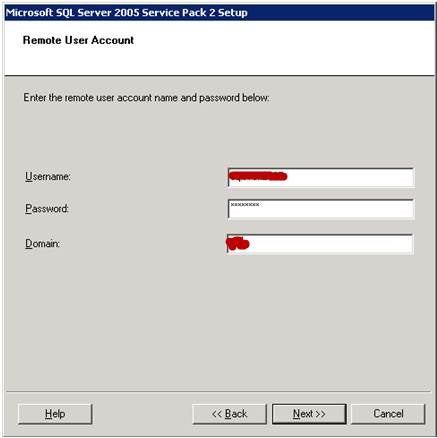
Remote User Account
Remote User Account page –> you should provide the username, password and domain of a login that has administrative permission on all of the clustered nodes for the clustered SQL instance in case the patching is also being performed remotely on other nodes.
You may have two newly added nodes that require patching, the login information you provided in this page will be used to log onto the nodes to perform the patching procedure.
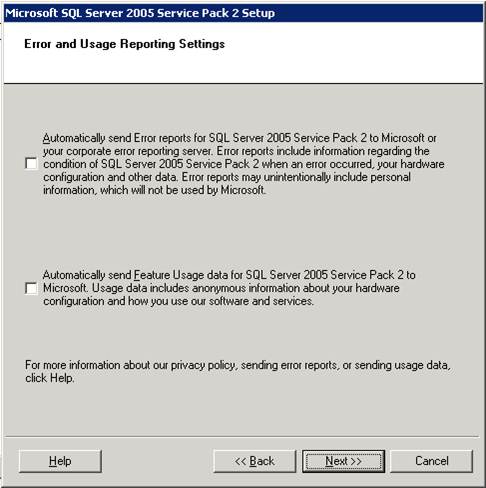
Error and Usage Reporting Settings
Error and Usage Reporting Settings page –> Depending on your company policy, you should decide whether or not to enable for both automatic reporting settings. Click Next to proceed.
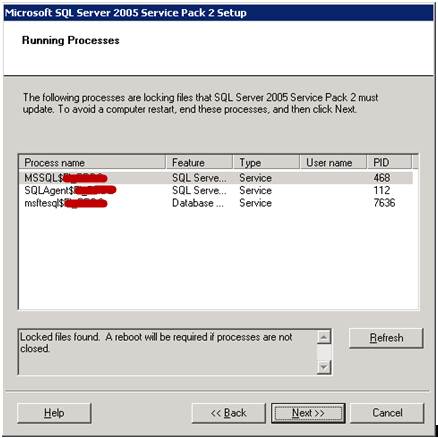
Running Processes
Running Processes Page –> you will see the services running for the clustered instance you are about to patch; they lock some files needed for the service pack update. Click Next to proceed.
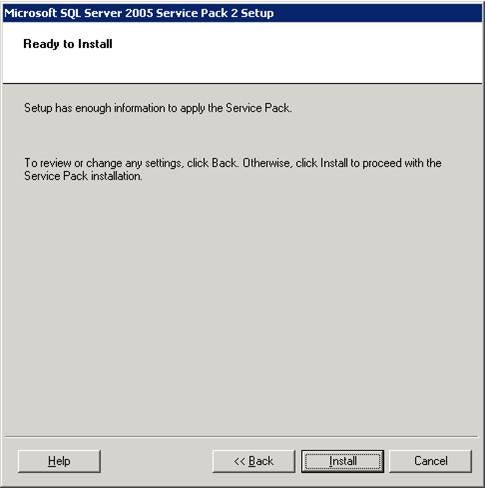
Ready to Install
Ready to Install –> Click Install once you are ready with the service pack update.

Installation Progress
Installation Progress page –> You can see the progress of service pack update patching on each component of the clustered instance. You will see the Clustered instance name on the masked portion.
Depending on your environment, this step may take some time.

Reminder to Reboot
You will also receive a reminder for “Computer Reboot Required”. Click OK to complete the service pack update.
Step 4: Reboot Server
Reboot the server right away after patching the service pack to make sure all necessary changes are in effect on the new node.
Step 5: Launch SQL Server 2005 Cumulative Update Executable
- Download the cumulative update (CU) to be applied after service pack 2.
- Open Cluster administrator, make sure the SQL instance is running on the new node.
- Pause the old nodes.
- Right click on the CU executable and run the setup process with a domain login with administrative permission on all of the clustered nodes for the SQL instance you are about to patch.
- Let the wizard guide you through patching all necessary components for the clustered instance.
- Complete the patching.
- Reboot a new clustered node to ensure all necessary changes are in effect after the patching.
Step 6: Resume Paused Clustered Nodes
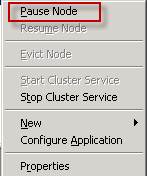
Once you have completed both service pack and hotfix update for the new nodes, you need to resume the paused node. Simply open the cluster administrator, right click on the paused node, then select “Resume Node”
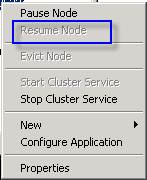
Resume Node
Step 7: Test Cluster Failover
Now all of the nodes are online, you will need to test the SQL instance by failing it over to all the nodes. Open the cluster administrator, then right click on the SQL Clustered Group, select “Move Group”, pick the server name listed under “Best Possible”, test the failover one by one.

Test the SQL instance by failing it over
Open SSMS and connect to the SQL instance after each failover. You will want to see the same version number no matter which clustered node the SQL instance is running on.
Open SSMS and connect ot the SQL instance
What’s the Take Away?
Pausing node is the simple but most vital step when patching new nodes on existing SQL instances. Without pausing the node, Service Pack update wizard will attempt to apply service pack on an already patched clustered node and hence fail the patching process.
Conclusion
This wraps up the 2 part series of adding and patching new nodes for an existing clustered SQL instance. I hope this will benefit readers that are thinking about increasing the scalability of SQL 2005 clustered instance and have a smooth process on setting up new a node.