


Introduction
With the combination of PHP and MySQL becoming one of the defacto standards for Web development, the need for a good front end for MySQL is increasing. For many, the task of creating and manipulating MySQL databases is a daunting task. It is often difficult to master the complex commands required by the MySQL console and MySQL Admin. Luckily there is hope. Due to the ever increasing popularity of MySQL and PHP, many third party tools are being developed specifically for these platforms.
In this article, we will take a look at the basics of connecting to and using one of the most popular of these MySQL graphical interfaces, SQLyog. You can download the latest version at http://www.webyog.com/sqlyog/download.html.
Getting Started
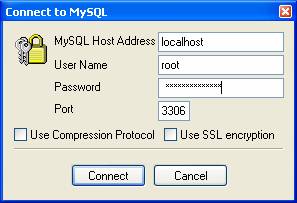
The first thing you get after starting SQLyog is the connection detail window. Just give the details and press Connect.
After connecting to the MySQL server you will see the SQLyog main window.
The first logical step to do with SQLyog is to create a database. This you can do by selecting DB -> Create Database (Ctrl+D). Give the database name and press Create!
Working With SQLyog
The main window of SQLyog is divided into three panes — Object Browser, SQL Window, Result Window.
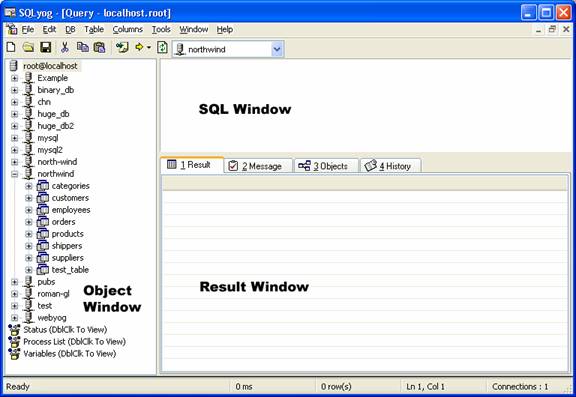
The Object Browser gives you details of all the Database/Tables/Columns/Indexes available in the MySQL server. You can Show/Hide Object Browser and Result Window by pressing Ctrl+1 and Ctrl+2 respectively.