


In this article, we’ll continue on with the setup of Oracle as a data source for SQL Server. As mentioned in Part 1, one of the requirements on the MSSQL side is that the version be of the Enterprise or Developer editions. One major plus of Oracle over Microsoft is that Oracle software has no expiration date, whereas the trial software from Microsoft has a shelf-life of 180 days. One obstacle, which may be insurmountable (if doing this on a personal computer), is meeting the system requirements for the Enterprise Edition of MSSQL. The specific showstopper is the operating system requirement, which is server class (2003 or 2008) across the board.
The simple workaround to this requirement is to use Developer Edition, which is equivalent to Enterprise Edition in almost every way. Developer Edition is not free (it was for a while) and it is not available via download (it was for a while). The bottom line is you have to order this edition and have it shipped to you. The good news is that the cost is fairly low, and with a little shopping around, you can find it online for less than what Microsoft lists it ($49.95 there versus $40.99 at Amazon).
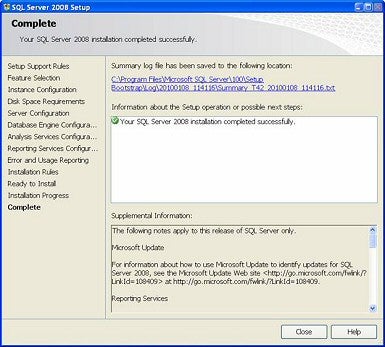
The installation process for Developer Edition (as it is for all 2008 versions) involves quite a few more “Next” clicks from the user (person installing), and it does seem to take a bit longer than MSSQL 2005 installations. The end result should have the results as seen in the screenshot below.
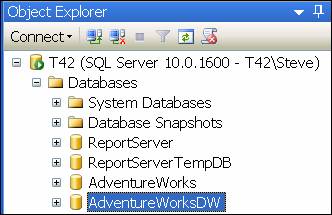
Another setup step is to attach (within MSSQL) a pre-configured sample database. While you’re at it, do two: the “normal” AdventureWorks database and its BI or DW version (named AdventureWorksDW). The installation files for the databases are located at an open source site, and the 2005 version of the files work just fine with 2008. The downloaded msi files don’t actually install the databases, but what they do is to place the main database and log files in a Data directory under your SQL Server installation folder. Once the mdf and ldf files are staged, use SQL Server Management Studio to attach the files. Pick a database file and MSSQL figures out the rest for you. At the end, you should see the databases as such:
Now that everything is up and running in MSSQL-land, you’re ready to “Create a Publication from an Oracle Database.”
Before going on with the steps provided by Microsoft, it is worthwhile to create a linked server (a database link in Oracle terms) to the Oracle database of interest. More than likely, your setup is going to consist of an installation of Oracle and SQL Server on the same computer/PC/notebook. We assume your Oracle installation is squared away (i.e., you can SQL*Plus your way into the database and connect as Scott or some other schema). What we don’t know yet is if your MSSQL to Oracle connection will work.
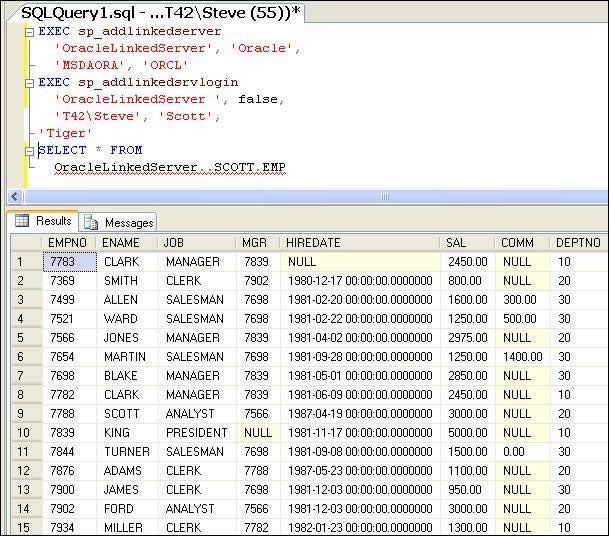
In a new query window in SQL Server Management Studio (SSMS), run the following commands, replacing items as shown via the comments. The two procedures can also be executed via the SSMS interface, but what to use in some of the fields is a bit cryptic, so having a T-SQL example to start with is useful (plus then you can go back into the properties and see what was filled in where).
EXEC sp_addlinkedserver   --name of the built-in stored proc
  'OracleLinkedServer',   --name of my linked server
  'Oracle',               --use Oracle here
  'MSDAORA',              --use this data source identifier
  'ORCL'                  --ORCL is the name of my database

EXEC sp_addlinkedsrvlogin --name of the built-in stored proc
  'OracleLinkedServer ',  --same name from sp_addlinkedserver
  false,                  --leave as false
  'T42\Steve',            --your server\user, or leave null
  'Scott',                --target schema in Oracle
  'Tiger'                 --password of the schema/user

--now ready to test the connection via a select statement
SELECT * FROM
  OracleLinkedServer..SCOTT.EMP
Your results should look similar to what is shown below (minus changes I’ve made in my version of the EMP table).
Without getting too far into other SQL Server database administration tasks, you may want to take backups of the master and msdb databases. If you have problems at the end of the creation process, removing linked servers (one related to publication, the other related to distribution) requires some additional steps, and MSSQL forums are rife with users complaining about not being able to drop a linked server. With the backups of the two system databases, you will have an easier go of it in terms of being able to start over.
In the set of steps shown in Part 1 (repeated below from MSDN) …
· Create a replication administrative user within the Oracle database using the supplied script.
· For the tables that you will publish, grant SELECT permission directly on each of them (not through a role) to the Oracle administrative user you created in step one.
· Install the Oracle client software and OLE DB provider on the Microsoft SQL Server Distributor, and then stop and restart the SQL Server instance. If the Distributor is running on a 64 bit platform, you must use the 64 bit version of the Oracle OLE DB provider.
· Configure the Oracle database as a Publisher at the SQL Server Distributor.
…the last step results in the following:
After the Oracle Publisher is identified at the SQL Server Distributor, replication creates a linked server with the same name as the TNS service name of the Oracle database. This linked server can be used only by replication. If you need to connect to the Oracle Publisher over a linked server connection, create another TNS service name, and then use this name when [creating the linked server].
In this example, with ORCL as the name of my Oracle database (and is the publication source), I can expect to see a linked server named ORCL when the setup is finished.
You have two options as to how to configure an Oracle publisher: use SQL Server Management Studio, or use Transact-SQL. The T-SQL reference is fairly useless, so we will use the GUI interface (SSMS). The next two major steps are to identify the Oracle publisher at the SQL Server distributor, and create the publication from the Oracle database.
The “distributor” is nothing more than a database within the SQL Server instance where we’re going to have the replication data from Oracle “published into.” This process creates a distribution database, named interestingly enough as “distribution.” The name of this database can be changed later. The role of the distributor is to manage the replication agents.
In the list of instructions on how to identify the Oracle Publisher at the SQL Server Distributor, there is no “Distributor Properties” option available after right-clicking the Replication folder. What we do know, however, is that we want to configure a distributor, create an Oracle publisher, and then create a publication from Oracle (where we pick the articles or tables we want to subscribe to).
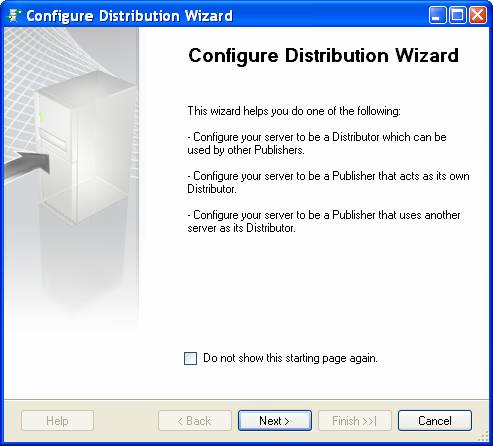
Configure Distribution
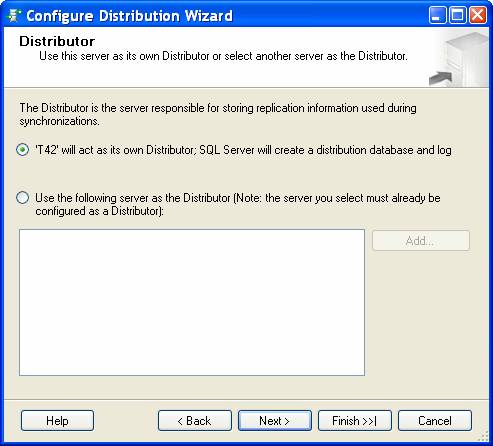
Right click Replication and click Configure Distribution. Click Next on the Configure Distribution Wizard starting page.
We’ll use the same instance as the distribution repository, so click Next.
At the next window, have the wizard configure the SQL Server Agent to start automatically. More than likely, this will be the case anyway after a default or typical installation, but if the agent is not set to start, then the running of scheduled snapshots (the idea of scheduled refreshes in materialized views covered in Part 1) will not take place.

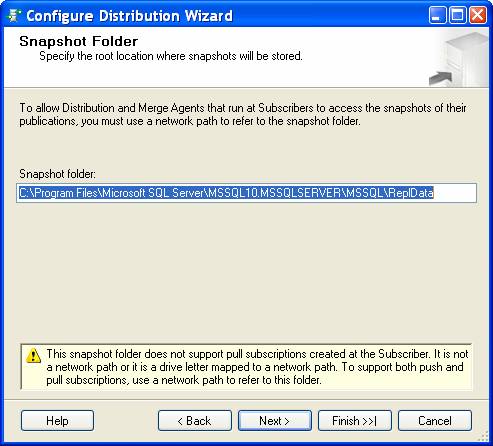
The snapshot folder is analogous to a materialized view log; in this example, the default location will suffice, but for permanent or larger implementations, you may want to use a different drive.
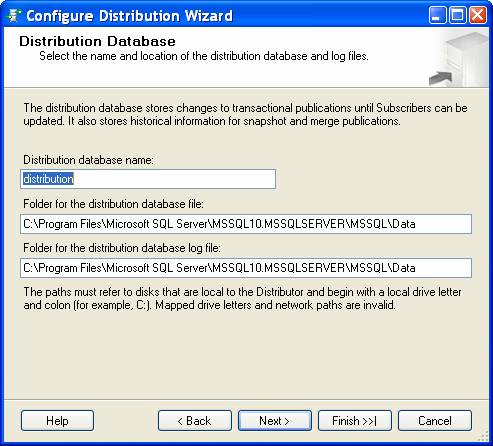
Use the default name of “distribution” for the distribution database, and use the default locations for the data and transaction log files (again with the caveat of placing these files in “better” locations for a real world implementation).
Click Next on the Publishers window (not shown), and then at the Configure Distribution window, select the checkbox if you want a script created in addition to having the setup performed.
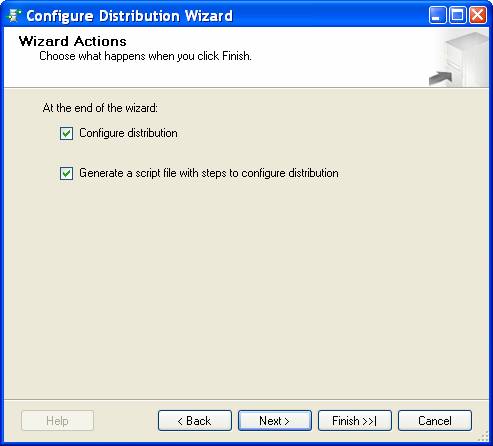
If you elect to generate a script, another window will appear (not shown) with the location and name of the file (and you can choose the format of the file). Finally, we reach a summary page, and click Finish to configure the distributor.
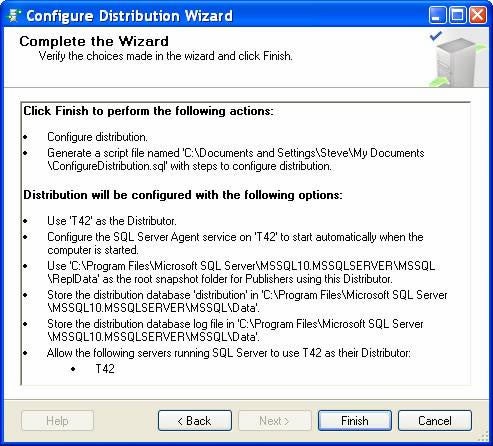
Hopefully, you’ll see the same success window as shown below.
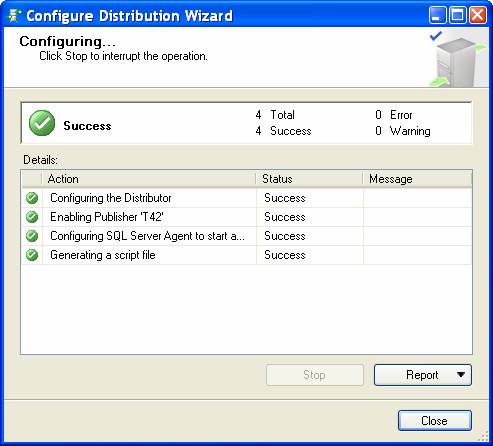
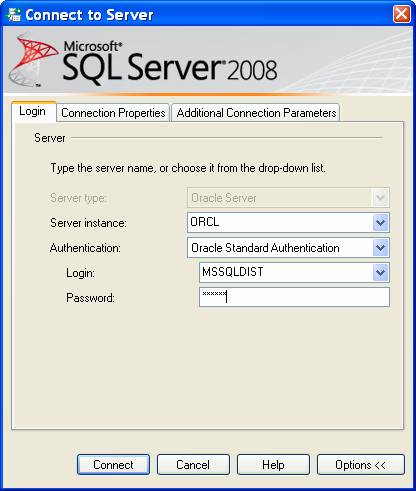
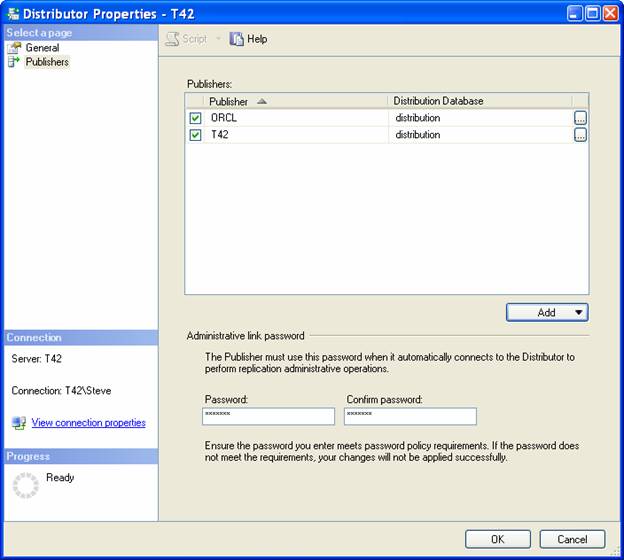
Upon completion of the configuration, the right-click menu items on Replication will be different, and from here, we can now follow the steps in the “How to” reference from MSDN. The first step is to Add Oracle Publisher. From the properties option and selecting the Publishers page, we get to the picture below.

Expand the Options on the Connect to Server dialog, and fill in your information (example here is the ORCL database with the MSSQLDIST user mentioned in Part 1).
In Connection Properties, we have a choice between Gateway and Complete as to the publisher type. You can read about the differences in the MSDN note, but for now, stay with Complete.
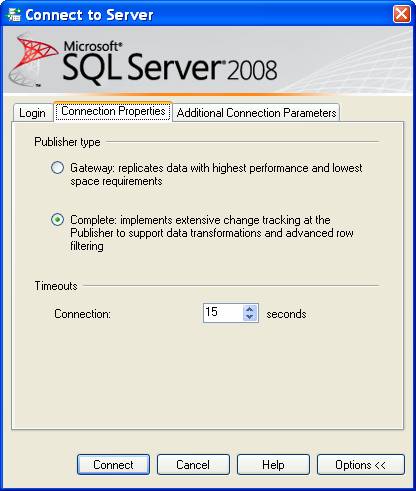
From here, click Connect. If no errors appear, the properties page is in focus and you will see ORCL (the server can be a publisher within MSSQL, so that’s why you see two entries).
Click OK to dismiss the properties window. The process executes (shouldn’t take more than a minute) and you are returned to SMSS. The next (and last) major step is to create a publication from Oracle.
Create a publication from Oracle
We’ve already granted SELECT on the tables of interest to our MSSQLDIST replication user, and in this step, we actually select the table(s) to be replicated. For simplicity’s sake, only the EMP table (all columns, and no filters applied) will be used.
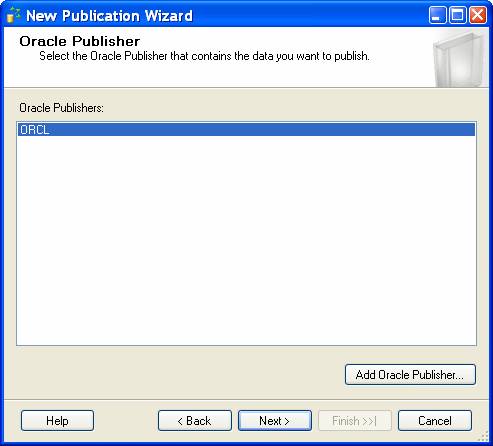
Continuing with the steps in the MSDN guide, go through the start page, select the ORCL publisher, and then decide between snapshot and transactional publication.
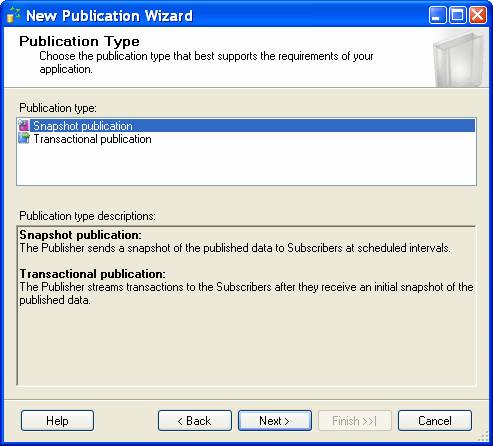
In this example, I selected transactional (screenshot shows Snapshot, which is the default), and you will have an option later to schedule this as well. In the Articles window, find the EMP table owned by SCOTT, and expand the selection to see the columns. Note the warning about the datatype conversion of the Oracle DATE field.
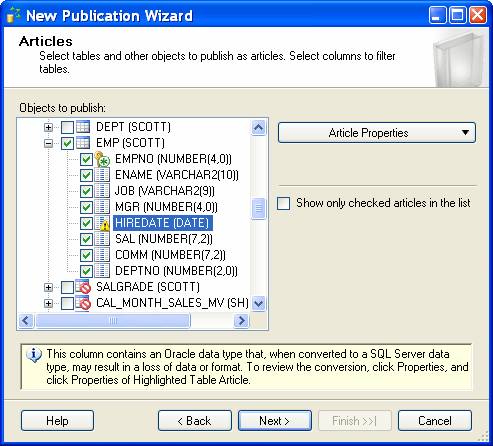
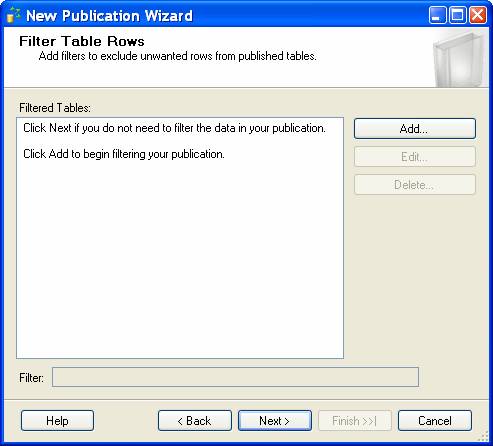
If you want, you can de-select the HIREDATE column to make this demo as clean as possible. I am not using any filtering, so Next is clicked in the subsequent window.

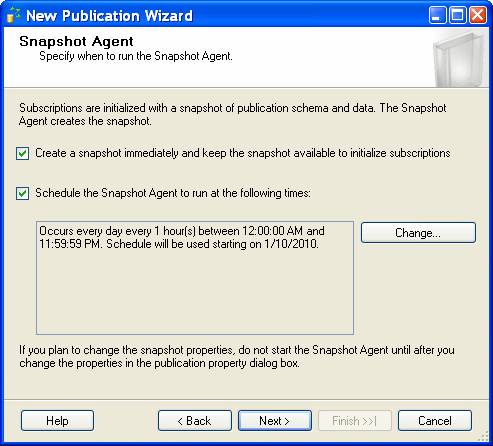
In checking the status of the SQL Server Agent, mine is set to start automatically, and I ensured it has administrator permissions by having created an “MSSQL” account and added it to the Administrators built-in group. In my setup, I selected both options (create a snapshot now, and then do it every hour on the hour).
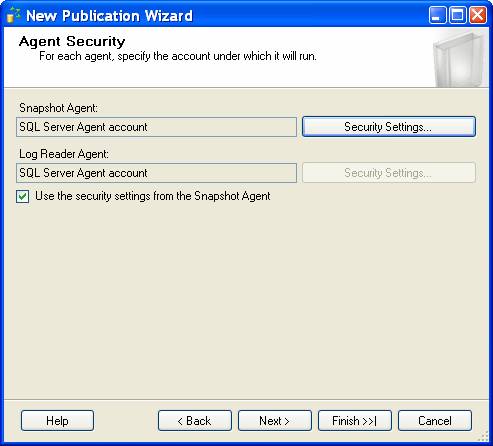
In the next window, we have to configure some security settings (not shown), and if you use a generic “MSSQL” account with admin privileges, everything will work. On the other hand, you can also elect to run this under the Agent’s settings, so either way, you’re covered.
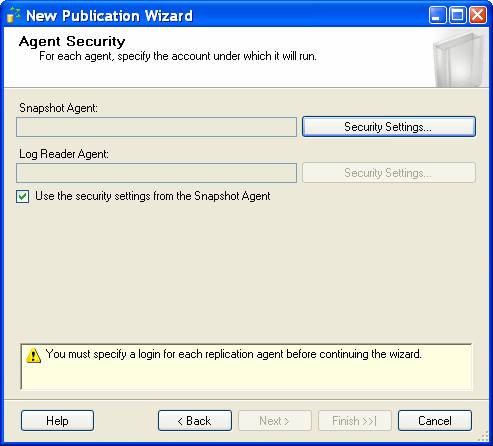
In Security Settings, I used the Agent, and upon return to the Agent Security window, the other agent fields are now populated.
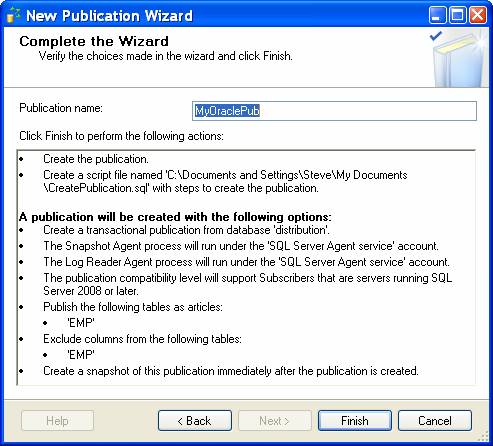
In the next window (Wizard Actions, not shown), create the publication and optionally generate the script. Finally, enter a name for the publication in the summary window, and click Finish.
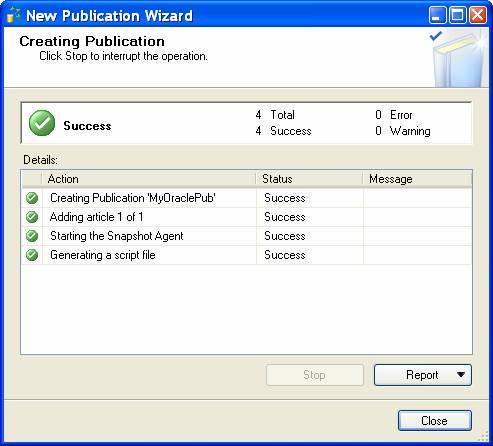
If all goes will, you will see the same success window shown below (with the exception of a generated script if you didn’t select that option).
In Summary
In the last part of this series, we’ll take a look at the aftermath (in a good sense of the word) of all these steps.