Service pack install – Client Components
In the
previous articles in this series (Part I,
Part
II and Part III)
you have seen how to install SQL Server client components, server components
using command line parameters and how to use a configuration file, such as .ini.
In this
section of this series, I am going to demonstrate how to install SQL Server 2005
Service Pack 1, to update the client components using command line options.
Step 1
Open SQL
server management studio, click on the Help menu and then click on About, to
display the version information. If you have the RTM version, it will display
the following message. Refer Fig 1.0

Fig 1.0
Step 2
Create
folder D:\install on the workstation or create this folder on a fileserver.
Note: Create folder and select drive
according to the availability in your environment.
Step 3
Download
SQL Server 2005 Service Pack 1 (SQLServer2005SP1-KB913090-XXX-LLL.exe) from www.microsoft.com/sql and save the file
to D:\install or on to the network shared drive. Refer Fig 1.1

Fig 1.1
Step 4
Click on
the Start button on the task bar, click run, and type the command CMD.exe,
which opens the MS-DOS shell command prompt.
Step 5
You may skip step 5 and Step 6 if you do not want to see the options
available in running setup and the report only option, which shows all the
components that would be upgraded when we run this install. Refer Fig 1.2
Execute the following command.
d:\install\SQLServer2005SP1-KB913090-x86-ENU.exe /?
Or
\\fileserver\shareddrive\SQLServer2005SP1-KB913090-XXX-LLL.exe
/?
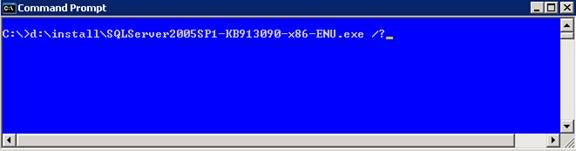
Fig 1.2
When the above command is executed, it will display all the
command line parameters available. Refer Fig 1.3, Fig 1.4 and Fig 1.5.

Fig 1.3
Fig 1.4

Fig 1.5
Step 6
You may skip this step if you do not want to see the options
available in running setup and the report only option, which shows all the
components that would be upgraded when we run this install.
Execute the following command. Refer Fig 1.6.
d:\install\SQLServer2005SP1-KB913090-x86-ENU.exe /reportonly
If you are using a network share then type the following command.
\\fileserver\shareddrive\SQLServer2005SP1-KB913090-XXX-LLL.exe
/reportonly
Note: Update the name of the fileserver with your actual fileserver
name and update the shared drive name accordingly.
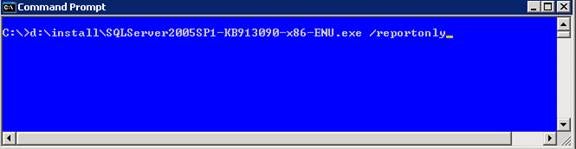
Fig 1.6
You will see the following information on the screen. Refer Fig 1.7,
Fig 1.8 and Fig 1.9
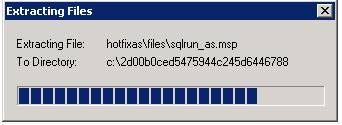
Fig 1.7
Fig 1.8
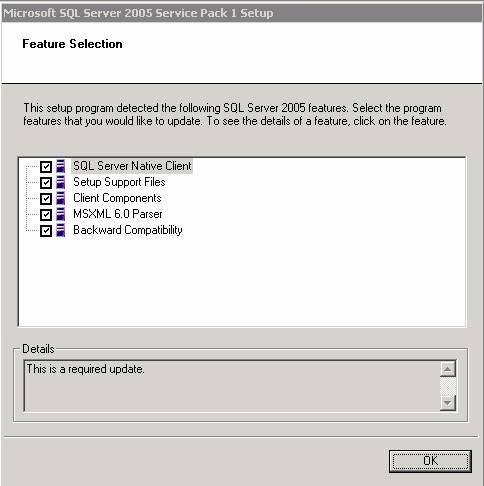
Fig 1.9
Step 7
Execute the following command. Refer Fig 2.0.
d:\install\SQLServer2005SP1-KB913090-x86-ENU.exe /quiet
If you are using a network share then type the following command.
\\fileserver\shareddrive\SQLServer2005SP1-KB913090-XXX-LLL.exe
/quiet
Note: Update the name of the fileserver with your actual fileserver
name and update the shared drive name accordingly.
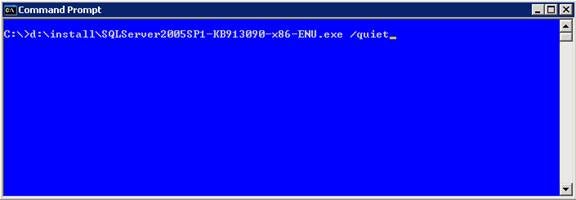
Fig 2.0
If you open the task manager, you will see the following
executable running as a windows task. Refer Fig 2.1.
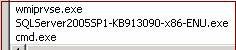
Fig 2.1
In addition, you can see the hotfix.log file is being written
under c:\windows\hotfix. Refer Fig 2.2 and Fig 2.3.
Note: C:\windows is the default windows directory. If your default
is not C:\windows, then navigate to the right windows folder and underneath it you
will find the hotfix folder.
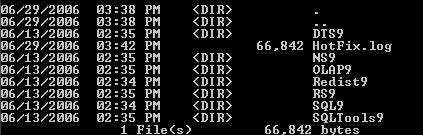
Fig 2.2
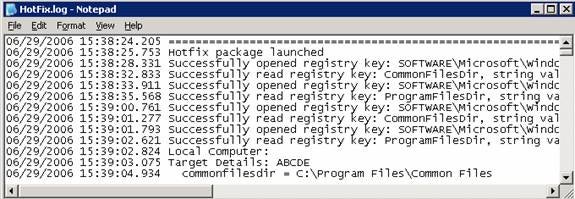
Fig 2.3
Step 8
Open SQL
server management studio, click on the Help menu and click on About, to display
the version information. It will display the following message. Refer Fig 2.4.
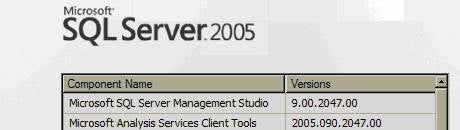
Fig 2.5
Conclusion
SQL
Server 2005 Service Packs can be installed using a setup.exe bunch of
parameters at the windows command prompt. In this section of this series, you
have learned how to install SQL server 2005 Service Pack 1 to update the client
components using command line options.