
Objective:
Use this procedure to deploy the Analysis Services
project.
Before deploying the Analysis Services project, we
will ensure alignment
of the deployment server. We will also change the name of the destination Analysis
Services database, to prevent write over of the Analysis Services DW
database if we have already installed it for education and testing purposes.
From inside Business Intelligence Development Studio
for the Analysis Services project you wish to deploy:
- Right-click the DBJ_Adventure Works DW Analysis
Services project in the Solution Explorer. - Select Properties from the context menu that
appears, as depicted in Illustration
1.
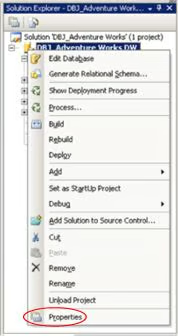
Illustration 1: Select
Properties for the Project …
The Properties
Pages dialog opens.
- Within the left-hand pane, under Configuration
Properties, select Deployment. - In the Target section of the right-hand pane,
ensure that the correct server / server instance combination is in
place in the Server box. - Within the Database section, replace the
existing Database name, Adventure Works DW, with the
following:
DBJ_Adventure Works DWThe Properties
Pages dialog appears, with our modified settings, similar to that shown in Illustration
2.
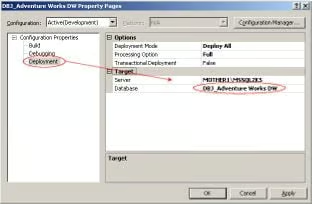
Illustration 2: The
Properties – Deployment Page, with Modified Settings …
- Click OK to accept changes and close the
dialog.
We can now deploy the project.
- Right-click the Adventure Works DW Analysis
Services project in the Solution Explorer, once again. - Select Deploy from the context menu that
appears, as depicted in Illustration 3.
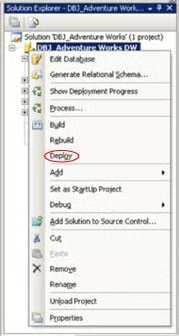
Illustration 3:
Initiating Analysis Services Project Deployment …
Deployment begins. Deployment and processing can be
monitored from the Deployment Progress viewer, where the steps of
processing are logged as they transpire. Once processing finishes, we receive
a Deployment Completed Successfully message in the Status bar at
the bottom of the viewer, as shown in Illustration 4.
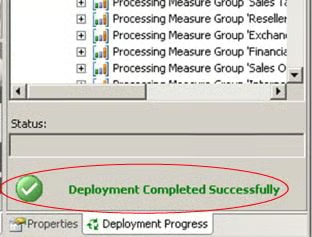
Illustration 4: “Process
Succeeded” Message