


From performing database backups and restores, rollbacks, sanity checks, and even the occasional report generation, there are a lot of tasks that database administrators (DBAs) have to fulfill on a regular basis. To save time and energy, most DBAs create batch jobs that can run as a Scheduled Task or on demand. The tools they use vary, based on the environment, operating system, database product, and the individual’s level of competency in programming scripts. DOS, WSH, and UNIX shell scripts are all standards tools of the trade.
For those of you who host your databases on Windows servers, there’s PowerShell, an interactive shell and scripting tool from Microsoft that combines the capabilities of the MS-DOS Command Prompt, batch files, Windows Scripting Host and even the powerful UNIX shells! Today we’re going to get a feel for the kinds of tasks that PowerShell can help you write with a lot less code.
What is PowerShell?
Windows PowerShell is a task-based command-line shell and scripting language designed especially for system administration. Built on the .NET Framework, Windows PowerShell helps IT professionals and power users control and automate the administration of the Windows operating system and applications that run on Windows. Using PowerShell, you can manage all the computers in your enterprise from the command line.
PowerShell includes an impressive array of commands (called cmdlets) and the ability to extend the tool with your own custom cmdlets. Probably the best feature of PowerShell is the pipeline, which allows you to execute a cmdlet and pipe its output to another cmdlet. Since PowerShell is built on the Microsoft.NET framework, the pipeline works with .NET objects rather than just text.
What You’ll Need
Windows 7 and Windows Server 2008 R2 both come with PowerShell 2.0. It’s also included with Windows Server 2008, but you do need to install it using the Server Manager. Here’s an article that describes how to do just that. If you’re using Windows Server 2003, XP, or Vista, you’ll have to download it and install it yourself. That will require some decision making on your part, because there are a few download packages to choose from. In addition to the basic PowerShell download, there are also those that come with some extra bells and whistles. One of these is the Windows Management Framework Core package. It includes the Windows Remote Management (WinRM) component, a standard Simple Object Access Protocol (SOAP)-based protocol that allows hardware and operating systems from different vendors to interoperate. It provides a common way for systems to access and exchange management information across an IT infrastructure. For you geeks out there, the Windows PowerShell 2.0 Software Development Kit (SDK) contains sample code and reference assemblies for building applications using PowerShell.
Regardless of which installation you go with, you may need to download a few other Microsoft components. In order to use PowerShell v2, Windows Server 2003, will require the Windows Server 2002 Service Pack 2 (SP2), Vista will require Windows Vista Service Pack 1 and 2, while XP requires theWindows XP Service Pack 3. Since PowerShell is based on the .NET language, the Microsoft .NET Framework 2.0 is a prerequisite to running PowerShell v2.
PowerShell comes in both 32 and 64 bit editions to support all of the above operating systems, with the exception of XP, which only supports 32 bit applications.
And finally, since you’re going to be working against a MySQL database, you’ll need the MySQL Connector for .Net. That’s a driver for MySQL built for Microsoft’s ActiveX Data Objects (ADO).
Getting Up and Running
Launching the PowerShell console differs depending on whether it was included with your OS or whether you installed it yourself. On Windows 7 and Windows Server 2008 R2, there should be a blue icon with a white arrow inside it on the taskbar:
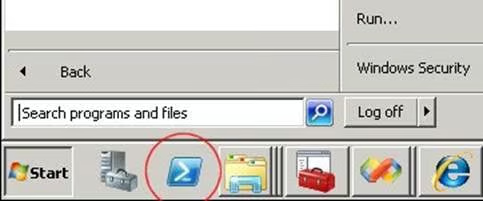
Launching Windows PowerShell Console
Clicking it will fire up the PowerShell console.
On older Windows versions, you’ll have to navigate to it from the Start menu, just as you would any other program:
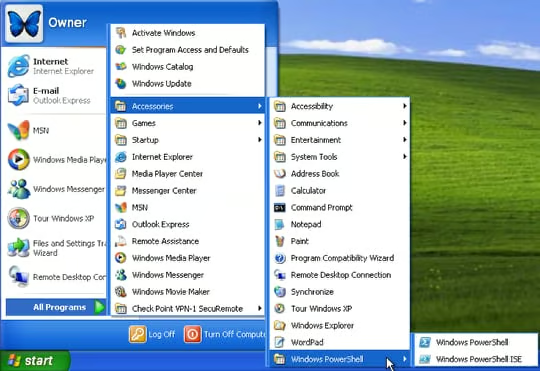
Launching Windows PowerShell Console from the Start Button
If you find that to be cumbersome, you can always create a shortcut on your desktop.
Here is the PowerShell console. It looks a lot like the DOS command window, but with the hallmark blue background:
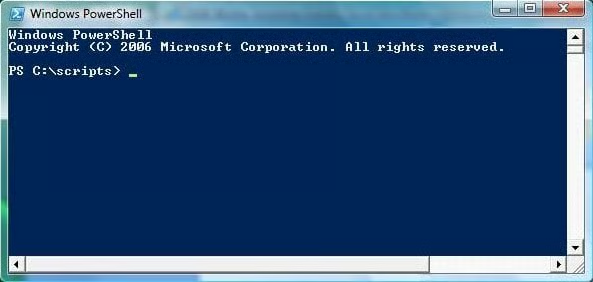
PowerShell Console
Connecting to the Database
Establishing a connection to your database is a breeze with PowerShell; all it takes is four commands:
- Remember the MySQL.Net connector that we downloaded earlier. We’ll need to load that component into memory by entering the following command with the full path to the MySQL.Data.dll file (note that your path may differ):
[void][system.reflection.Assembly]::LoadFrom("C:\Program
Files\MySQL\MySQL Connector Net 5.0.9\Binaries\.NET 2.0\MySQL.Data.dll")
Here is the default path for 64 bit systems:
[void][system.reflection.Assembly]::LoadFrom("C:\Program Files
(x86)\MySQL\MySQL Connector Net 5.0.9\Binaries\.NET 2.0\MySQL.Data.dll")
The LoadWithPartialName function also does the job:
[void][System.Reflection.Assembly]::LoadWithPartialName("MySql.Data")- Create a variable to hold the connection:
$myconnection = New-Object MySql.Data.MySqlClient.MySqlConnection- Set the connection string:
$myconnection.ConnectionString = \"server=localhost;user
id=test;password=test;database=test;pooling=false\"- Call the Connection object’s Open() method:
$myconnection.Open()Issuing a Database Command
To issue a command to your MySQL database:
- Create a variable to hold the command:
$mycommand = New-Object MySql.Data.MySqlClient.MySqlCommand- Set the command’s connection property to our connection variable:
$mycommand.Connection = $myconnection- Set the command text:
$mycommand.CommandText = "SHOW TABLES"- Instantiate a reader variable and set it to the results of the command object’s ExecuteReader() method:
$myreader = $mycommand.ExecuteReader()- Display the results of the Read() method as long as there are results:
while($myreader.Read()){ $myreader.GetString(0) }The above code will print all of the tables in the database.
If you’re going to issue similar commands all the time, it would be beneficial to put all your code in a script file. That will be the topic of the next article, as well as how to write a function to execute queries against the database.