In Part 1 of this series, I discussed how to use the Database Explorer view in the IBM Rational Application Developer for WebSphereSoftware (Rational AD) product to create and work with IBM DB2 Universal Database (DB2 UDB) for Linux, UNIX, and Windows database connections. Part 2 introduced you to some of the many capabilities provided by the Data Definition view in the Rational AD integrated development environment (IDE). In this part, we will look at how to build stored procedures using the Data Definition view. You will learn how to build stored procedures, use variables within them, and how to deploy and test them.
Note: Ensure that you are in the Data Perspective when performing the steps outlined in this article.
Building a Stored Procedure
In this section, I will show you how to build a stored procedure using the Data Definition view. To complete the steps in this part of the series, you need to import the SAMPLE database (or any database for which you want to create a stored procedure) into your DATABASEJOURNALSERIES project.
Prepping the Database Explorer View
In order to build a stored procedure using Rational AD in your database, the database must be in your project. For this article, we assume you imported the SAMPLE database.
As a quick refresher, you can follow the steps below:
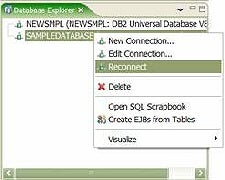
1. Right-click the SAMPLE database entry in the Database Explorer and select Reconnect, as shown below:
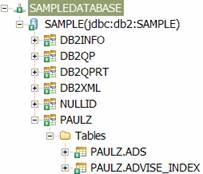
You will know that you have a connection to this database because you will be able to expand the contents of this folder (using the sign) and see the objects in the database, as shown below:
2. Right-click the connected database and select Copy to Project, as shown below:
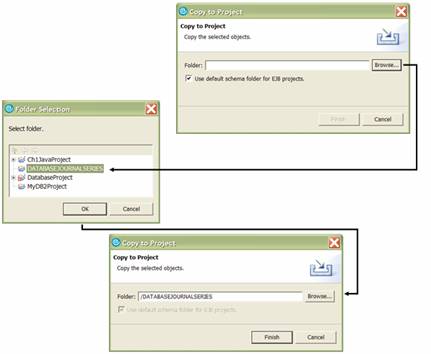
3. Use the Browse button to locate the project you want to import the database into (for our example, select the DATABASEJOURNALSERIES project), and click Finish, as shown below:
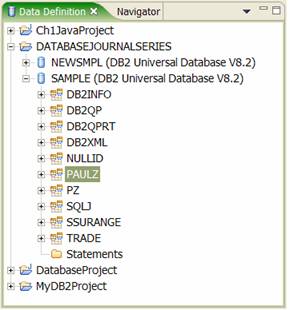
When you complete the previous steps, the DATABASEJOURNALSERIES project in the Data Definition view should look similar to this. (The order of the objects within your project depends on when they were added.)
Note: In the previous figure, I have highlighted the PAULZ schema. Whatever user ID was used to create the SAMPLE database (the system user account you used when you entered the db2sampl command in Part 1) will be used for the user tables in this database. Specifically, we will be working with the STAFF table, so I would qualify this table as PAULZ.STAFF. If you are logged on to your system with the same user account that you used to create the SAMPLE database in Part 1, then you may not have to explicitly specify your schema to qualify the STAFF table when writing SQL. However, it is generally considered a ‘best practice’ to fully qualify an object with its schema name.
Building the Stored Procedure
In this section, I will show you how to build an SQL/PL-based stored procedure that takes a numeric input (which represents a department number) and returns the names of employees who work in the corresponding department. For this example, the source of the employee data is the STAFF table, which resides in the SAMPLE database.
To build this stored procedure in the Rational AD IDE, perform the following steps:
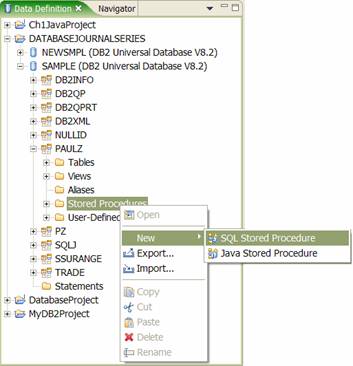
1. Expand the schema where you want to create your stored procedure, right-click the Stored Procedures folder, and select SQL Stored Procedure, as shown below:
The stored procedure language used by DB2 UDB is called SQL/PL – it is an open ANSI-compliant language for writing business logic in databases. You can use Rational AD to create both Java-based and SQL-based stored procedures. In fact, Rational AD can be used to test any kind of stored procedures, including .NET CLR-based stored procedures in DB2 for Windows data servers.
Since the DB2 UDB V8.2 for Linux, UNIX, and Windows release, you no longer require a compiler to build SQL/PL procedures. You can use the Data Definition view in Rational AD to build stored procedures for DB2 UDB for i5/OS and DB2 UDB for z/OS databases as well (provided you have the DB2 Connect product installed; however, this article assumes you are using an installation of DB2 UDB on the Linux, UNIX, or Windows platform).
2. The New SQL Stored Procedure wizard opens. Type a name for this stored procedure (for this article, use the name STAFFSELECTION) in the Name field. In addition to this, ensure that the Build and Enable debugging check boxes are selected, and then click Next.
Selecting the Build check box instructs Rational AD to automatically build the stored procedure in the database immediately after you click Finish in this wizard. If you do not select this check box, you will have to explicitly tell Rational AD to build the stored procedure in the database at a later time.
As its name suggests, the Enable debugging check box enables this stored procedure for debugging. You can use the integrated debugger in Rational AD to set breakpoints, view variable values, and other typical things that debuggers do. Click Next.
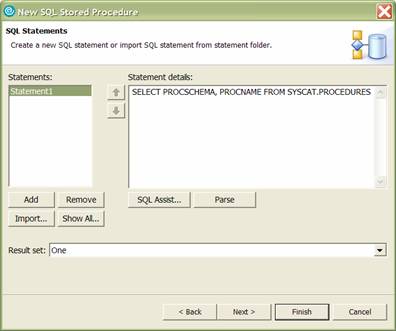
3. The SQL Statements page of this wizard opens. You can build the SQL statement for this stored procedure using the SQL Assist wizard by clicking on its associated button (the focus of the remainder of this step). Alternatively, you can enter it directly in the Statement details pane, and click Next.
For reference, the SQL statement used for this stored procedure is:
SELECT * FROM PAULZ.STAFF

 WHERE DEPT = :INDEPT

     ORDER BY YEARS ASC
The remaining instructions in this step show you how to create the previous SQL statement using the SQL Assist feature in Rational AD. As you get more experienced with the Rational AD IDE, you will find there are many ways to build SQL statements like this, and their associated parameters, for your routines. For example, you can specify a parameter directly in the SQL, or use the Parameters page that follows (see Step 4).
The following steps (a-f) detail the method that I find the most direct and easiest to build the previous SQL statement for a stored procedure. (They include specification of the parameter for this routine.)
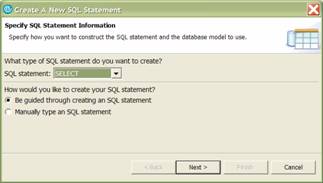
a. Click SQL Assist. The Specify SQL Statement Information page opens:
If you wanted to build the SQL statement manually using the SQL editor, you could select the Manually type an SQL statement radio button. (In Part 4 of this series, I will take you through this process and introduce you to the SQL editor that is built into the Rational AD IDE and show how it can be used to build multiple statements.)
b. Select SELECT from the SQL statement drop-down box (since we want to build a stored procedure that simply selects values from the STAFF table) and the Be guided through creating an SQL statement radio button, and click Next.
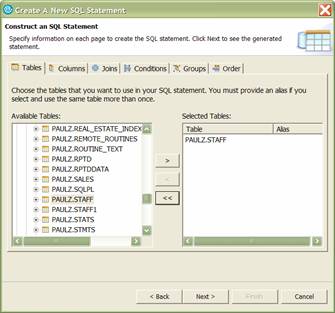
c. The Construct an SQL Statement page for this wizard opens. Ensure that the STAFF (remember to use the appropriate schema) table is moved to the Select Tables window and click the Columns tab:
d. Use the Columns tab to specify the columns to be retrieved by your SQL stored procedure. For this example, simply move all the columns to the Selected Columns pane (use the >> button), as shown below, and click Conditions:
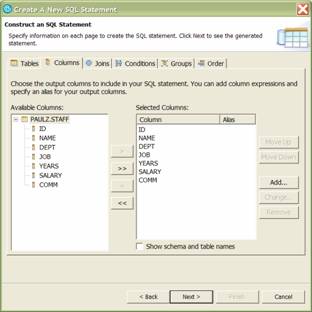
Note: You can click the Joins tab to specify the join predicates if you are building an SQL statement that references more than one table. Since our example only uses the STAFF table, you can skip this tab entirely.
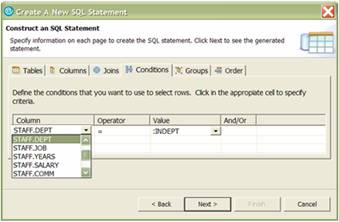
e. Use the Conditions tab to specify the conditions for your SQL statement. Ensure that your page looks similar to this, and click Next:
When you click a column on this page (the figure above shows the Column column), you can select a corresponding item from the drop-down list that appears. In the previous figure, you would select STAFF.DEPT to select the column on which you want to build the WHERE condition. (Recall that this stored procedure will select all of the employees in the STAFF table based on the department they work in.) For the Operator column, ensure that you selected the = operator. In the Value column, you can select a value or just enter a parameter (denoted with a colon). For this example, type :INDEPT in the Value column.
In the same manner in which you selected objects and values in this step, you can group the result set of your stored procedure using the Groups tab.
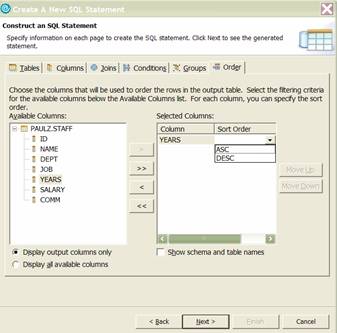
In addition to this, you can use the Order tab to specify the order of the result set. To set the order of your result set, simply move columns to the Selected Columns window and select the order (ascending or descending), as shown below:
You can specify the order of the result set using the columns returned by the stored procedure, or an order based on a column that was projected out of the result set in a previous step.


