


Welcome to the second article in my series SQL Server Administration in 15
Minutes a Week. In last week’s article, we took a look at an overview of the
options and requirements when installing SQL Server 2000. This week we will look
at how to perform a basic installation of SQL Server 2000. The topics for this
article include:
– Before the Installation
– Installation Overview
Before the Installation
Use the following as a checklist before you install SQL Server 2000:
– Have your SQL Server 2000 CD, Installation Key, and operating system CD handy
– You should be logged on using an account that has Administrative rights.
– Disable any Antivirus software that is running as it can sometimes effect the
installation.
– Shut down any services or applications that depend on SQL Server, Data Source
Names (DSN), or Open Database Connectivity (ODBC).
– Close any unnecessary applications that access the registry
– Close the Event Viewer (Microsoft says so!)
Installation Overview
1. When you place the SQL Server 2000 CD-ROM in your drive, you are greeted with
the screen shown below. If you don’t see the SQL Server menu, you
most likely have autorun disabled. To start the SQL Server menu manually use the
Windows Explorer and run autorun.exe from your CD-ROM drive. You can also use
“Run…” from the start menu and enter d:\autorun.exe where d: is the letter of
your CD-ROM drive.
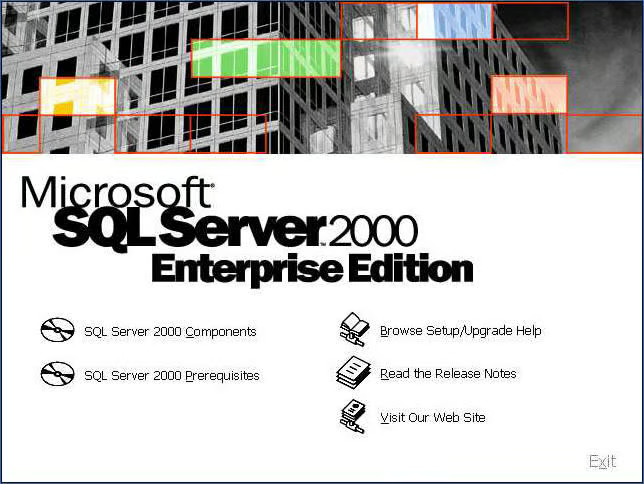
Click on "SQL Server 2000 Components” to view the available components you can
install.
2. Now we are presented with three options on the components screen. Lets
continue our installation by installing the Database Server. We will look at the
Analysis Service and English Query components in a later article.
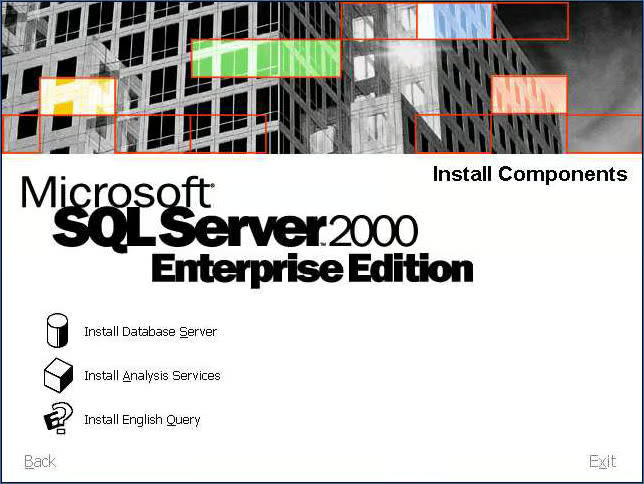
Click on “Install Database Server” to begin the SQL Server 2000 Installation.
3. The installation of the Database Server now begins.
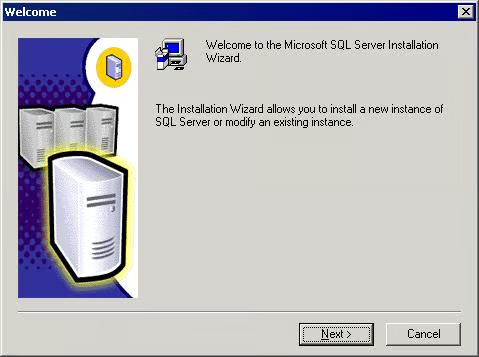
Click Next to continue the installation.
4. We are now prompted to select which computer we would like to install SQL
Server on. There are three options:
Local Computer — Installs SQL Server onto the local computer
Remote Computer — Installs SQL Server onto a remote computer on the network
Virtual Server — Used for installing SQL Server onto a Server Cluster
In this article we will look at an installation of SQL Server 2000 on a local
computer only. In the next article of this series I will discuss Remote and
Clustered installations.

Select “Local Computer” and click Next.
5. Now that we have selected where we would like to install SQL Server we have
to choose what we would like to do in this installation.
Create a new instance — Allows you to install a new instance of SQL Server or
the Client Tools
Upgrade, remove, or add components — Allows you to work with an existing
instance that is already installed
Advanced options — Allows you to create custom installation files, rebuild
registry keys, and maintain Virtual Servers for Failover Clustering
For now we will look at how to create a new instance. In my next article I will
cover how to upgrade an existing instance, perform unattended installations, and
configure a clustered server.
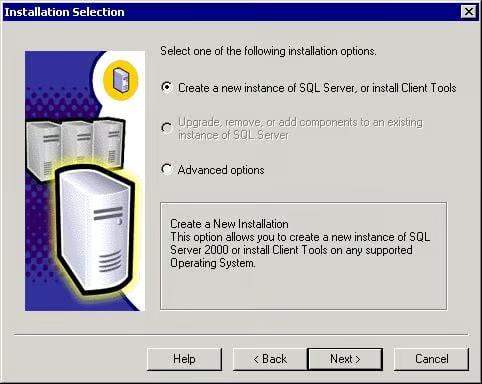
Select “Create a new instance of SQL Server, or install Client Tools” and click
Next.
Page 2: The Installation Continues…
»
See All Articles by ColumnistMichael Aubert