When Microsoft released Service Pack 2 (SP2) for SQL Server 2005,
they added a new feature called Custom Reports. This new feature allows you to
build Reporting Services reports that can be rendered within SQL Server
Management Studio (SSMS). There is no requirement to install Reporting
Services to use the Custom Reports feature of SP2, this feature is built into
SQL Server 2005. With this new feature, you are able to build your own reports
to easily enhance the reporting capabilities of SSMS. In this article, I will
show you how to build your own Custom Reports.
Hello World Custom Report
You create a custom report just as you would any other
Reporting Services report. You start by opening up a Visual Studio Reporting
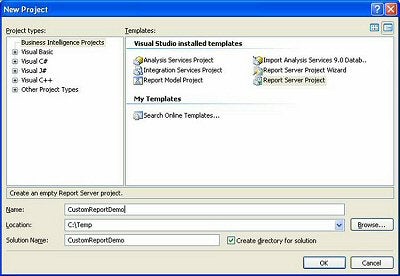
Services Project. The following screen shot shows the options I have selected
for my new Visual Studio project for building the Hello World Custom Report:
Here I have named my project “CustomReportDemo” which will
be saved in the “C:\Temp\” directory. By clicking on the “OK” button, my
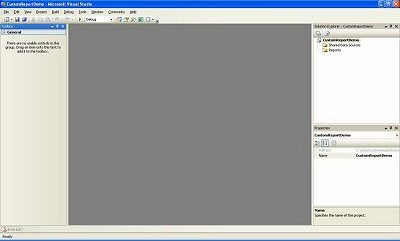
project folder will be created and the following screen is displayed:
To build my report I have to add a new report to my project.
To do this I right click on the “Reports” item in the “Solution Explorer”
window. When I do this, I have three different options for adding reports:
“Add New Report”, “Add”, or “Import Reports”. The “Add New Report” option
will allow me to create a report using the Report Wizard. The “Add” option
allows me to create an empty new item or I can add an existing Reporting
Services report to my project. The “Import Reports” option allows me to import
Microsoft Access Reports. For my Custom Reporting demo, I will be creating
new Report Services report from scratch so I will be using the “Add”-“New Item”
option.
For my first Custom Report demo, I will create the all too
famous “Hello World” report. In order to do this I need to add the report to
my solution. So, I select the “Add” item followed by the “New Item” option to
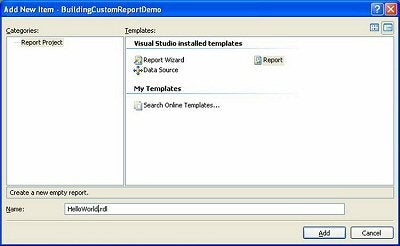
create an empty report. When I do this the following “Add New Item” dialog
window is displayed where I can specify my report options:
As you can see, I selected the “Report” template item and
then named my new empty report “HelloWorld.rdl”. Clicking the “Add” button
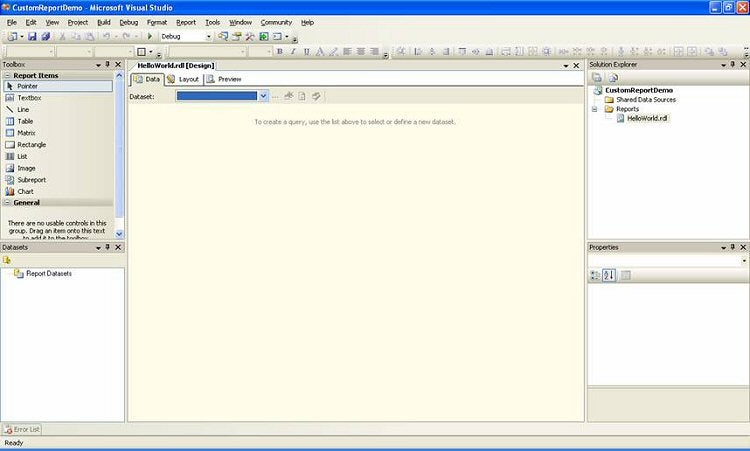
will add this empty report to my solution. Upon doing so the following screen
will be displayed:
Now that I have an empty report, I need to determine what I
want in my report. For my Hello World custom report I want to display the
phrase “Hello World from <server name>” where <server name> is
replaced with the name of the SQL Server instances in which my custom report is
run against. In order to create my report I will need a textbox and a report
parameter. First, let me create the report parameter.
The report parameter will be used to hold the name of the
server in which my report is run. To create a report parameter for my
HelloWorld.rdl report I use the “Report” item on the main menu, than select the
“Report Parameters…” from the drop down menu. When I do this, the following
screen is displayed:
On this screen, I can create my report parameter, which I
will call ServerName. To do this I click on the Add button. When I do this
the “Properties” items become available, and I enter “ServerName” in the
“Name:” item. I don’t need to specify anything else, so I click on the “OK”
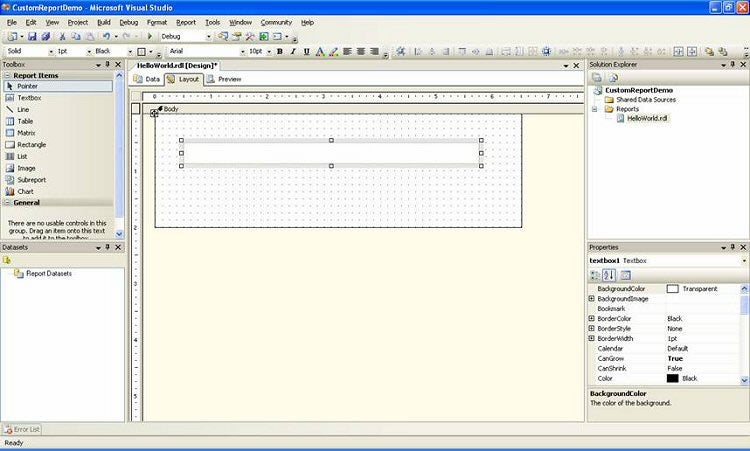
button. Now to finish my report I just need to create a textbox and populate
it with my dynamic hello world string. To do this I drag a textbox item from
the toolbox onto my report body surface, and stretch it a little to hold my
hello world string. When I’m done my screen looks like this:
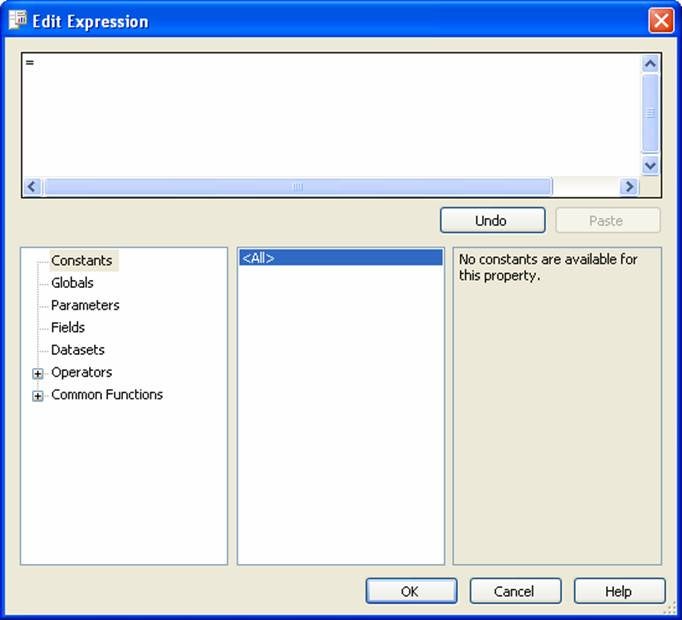
Now to populate that text box I need to build the expression
that will render my hello world string in the textbox. To do this I click on
the textbox to bring it into focus and then right click and select the
“Expression…” item from the list of options. When I do this, the following
screen is displayed:
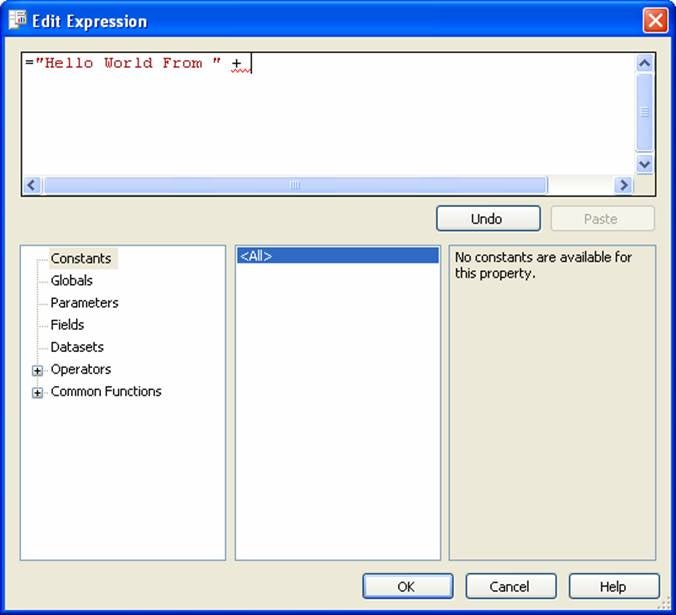
Now I can build my hello world string by first typing “Hello
World from “ followed by a plus sign (+) next to the equal sign (=) in the
upper portion of the “Edit Expression” dialog window. When I do this my dialog
window looks like this:
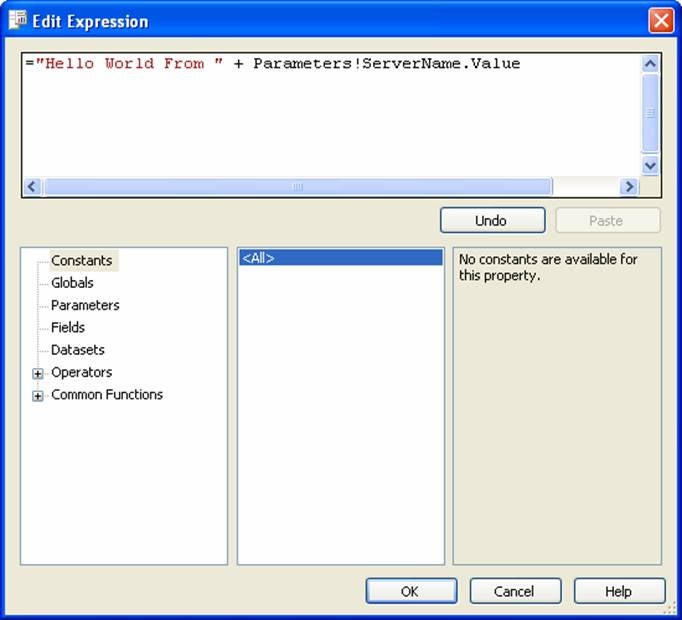
With the cursor to the right of the plus sign (+) I can add
my ServerName parameter variable. To do this I click on the “Parameters” item
in the lower left hand pane, which then displays my parameter in the lower
right pane of the above screen shot. To add my ServerName parameter to the
expression I just need to double click on it. After doing this the Edit
Expression window looks like this:
Now I just click on the “OK” button to complete the building
of my expression that will populate my text box when I render my HelloWorld.rdl
file.
At this point, I am done building my Hello World report. I
now save my report, and exit out of Visual Studio.
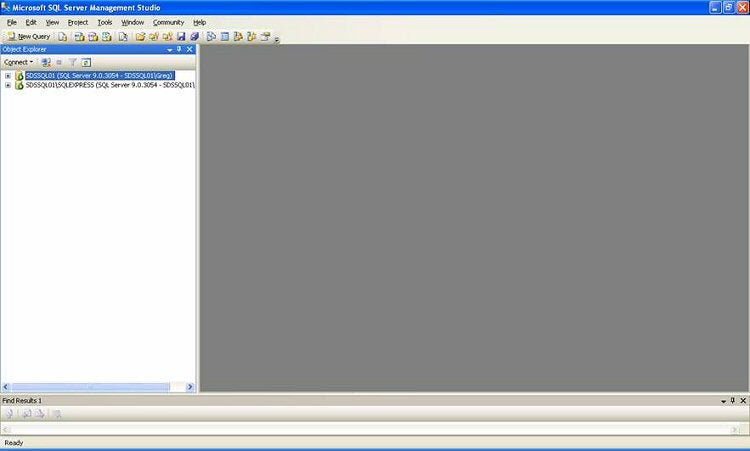
To display my custom Hello World report I open SSMS and
bring up the Object Explorer view. To demonstrate how my report dynamically
changes the Server Name I connect to two different instances running on my
laptop: SDSSQL01 and SDSSQL01\SQLEXPRESS as the following screen shows:
To render my custom report I will right click on one of my
SQL Server nodes: SDSSQL01\SQLEXPRESS. Then I hover over the “Report” item and
another drop down is displayed. In this second drop down, I click on the
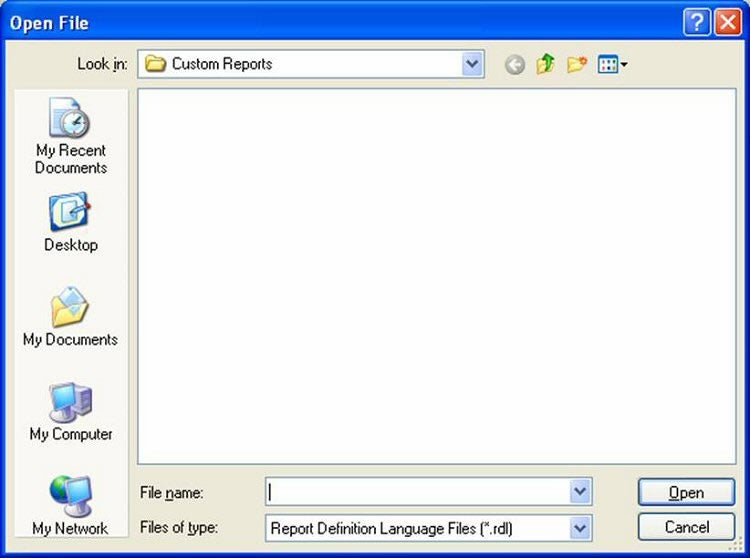
“Custom Report…” item, which displays an “Open File” dialog box as shown below:
Here I can browse to where I saved my HelloWorld.rdl file,
which in my case is “C:\temp\CustomReportDemo\CustomReportDemo\HelloWorld.rdl”.
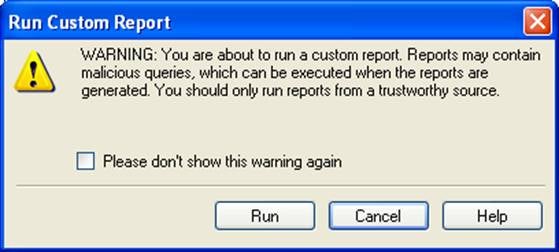
Once I have selected my rdl file I click on the Open button in the “Open File”
dialog. This brings up the following warning:
To render my Hello World report I click on the “Run”
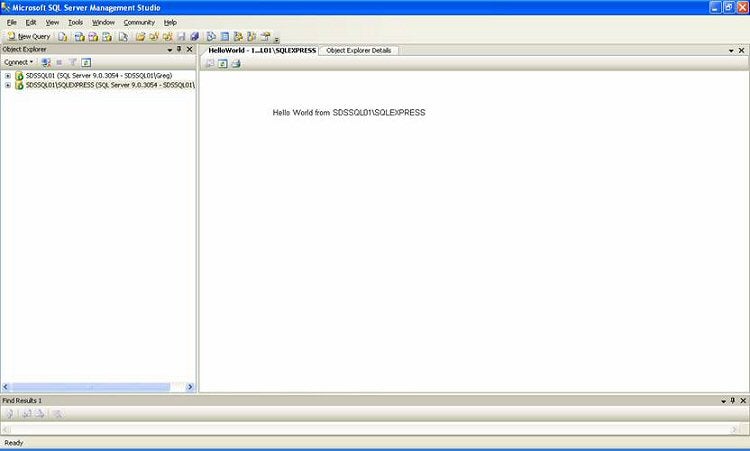
button. It takes a few seconds to render the report. Once the rendering is done,
the following report is displayed:
Here you can see my report says “Hello World from
SDSSQL01\SQLEXPRESS”. Now if I change the context of my report, to my default
instance named “SDSSQL01”, and bring up my custom Hello World report again the
message displayed will be “Hello World from “SDSSQL1”. How does this occur?
The Custom Report feature of SP2 provides the facility to dynamically populate
a number of different report parameters, one of those being ServerName, more on
this in the next section. Therefore, every time I render this report the
report determines what Object Explorer node I rendered it from and sets the
ServerName parameter appropriately.


