SQL Azure Data Sync provides data synchronization between the cloud and local SQL Server databases. Learn how SQL Azure Data Sync allows you to keep the most concurrent information in the cloud while allowing mobile users, businesses, and enterprise data sources all to have access to this data.
Introduction
In an effort to bring a flexible cloud-computing experience Microsoft has
introduced the Microsoft Azure platform. One of the many offerings is the cloud-based
relational database service built on SQL Server technologies called Microsoft
SQL Azure Database. To help keep managed data movement between the
cloud based SQL Azure Database and your local SQL Server databases, Microsoft
has provided a tool called SQL Azure Data Sync. Let’s look closer at this powerful
tool.
SQL Azure Data Sync allows one to keep the most concurrent information in
the cloud (SQL Azure) and allows mobile users, businesses, and enterprise data
sources all to have access to this data, which is in the cloud, facilitating
office machines as well as mobile desktop and handhelds to work together.
SQL Azure Data Sync Features
SQL Azure Data Sync allows:
- Data synchronization between SQL Azure databases. Imagine Ebay.com sharing customer profile information to Google to help target customers with relevant advertisements and both their databases would be in the cloud.
- Data synchronization between SQL Azure database and on-premise SQL Server data. Imagine a Point-of-sale device which a salesperson will use to update available inventory in his office (cold call results in sales, he updates the on-premise) and also update the inventory when he makes client visits
It also provides Microsoft Visual Studio templates, which allow developers
to bring the SQL Azure Database to SQL Compact Databases.
Getting Started
To get started, you need to do the following:
- Download and install the 32-bit version of Microsoft Sync Framework 2.1 Software Development Kit from http://www.microsoft.com/downloads/details.aspx?FamilyID=ee6af141-79d0-4351-a4a0-ea89bb29dcf5&displaylang=en
- Download and install the Microsoft Sync Framework Power Pack for SQL Azure November CTP from http://www.microsoft.com/downloads/details.aspx?FamilyID=bce4ad61-5b76-4101-8311-e928e7250b9a&displaylang=en#filelist
- Visit http://www.microsoft.com/windowsazure/offers/ and sign up for one of the plans offered for SQL Azure. For this article, I have opted for Introductory Special Package. Make sure to activate your service.
- If you don’t have Microsoft Visual Studio Professional 2008 with SP1 installed, you will need to install one to get the SQL Azure template (not to use the SQL Azure Data Sync tool). The Azure template currently only works with VS2008 SKUs. You can get VS 2008 SKUS free of charge at http://www.microsoft.com/downloads/details.aspx?displaylang=en&FamilyID=83c3a1ec-ed72-4a79-8961-25635db0192b
Using the SQL Azure Data Sync Tool
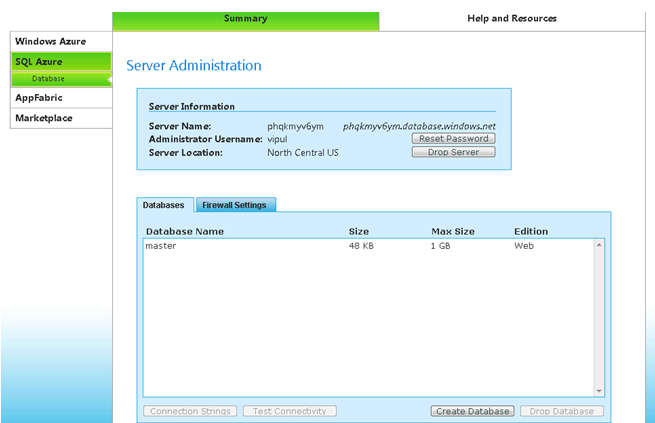
Once you have signed up for the offer mentioned above and activated your account, visit https://sql.azure.com/projectviewer.aspx and setup your database. To allow for the SQL Azure Data Sync tool to work, you will need to allow filters for the external IP address of the machine from which you are running the Data Sync tool.
Here is how the screen looks.
Once you have setup the SQL database, copy the database name and administrator name for use in the Data Sync tool.
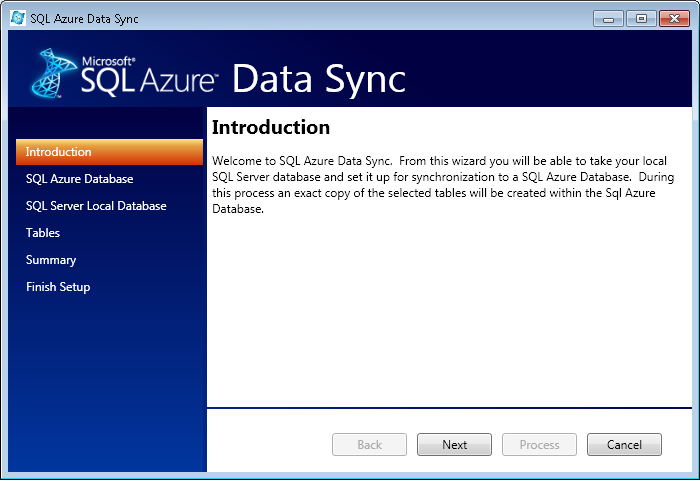
Start the SQL Azure Data Sync tool.
Click Next.
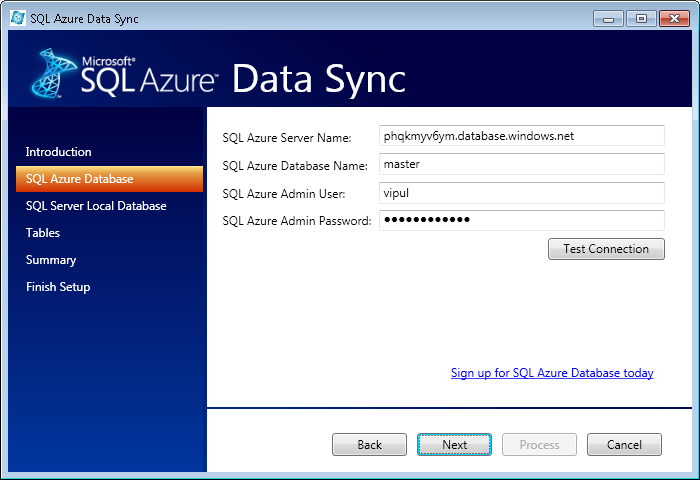
Enter the Azure SQL database credentials you created above. Once you enter the credentials, test the connection by clicking on “Test Connection”. If you get an error saying connection failed despite providing the right credentials, double check that the external IP is allowed through the firewall settings.
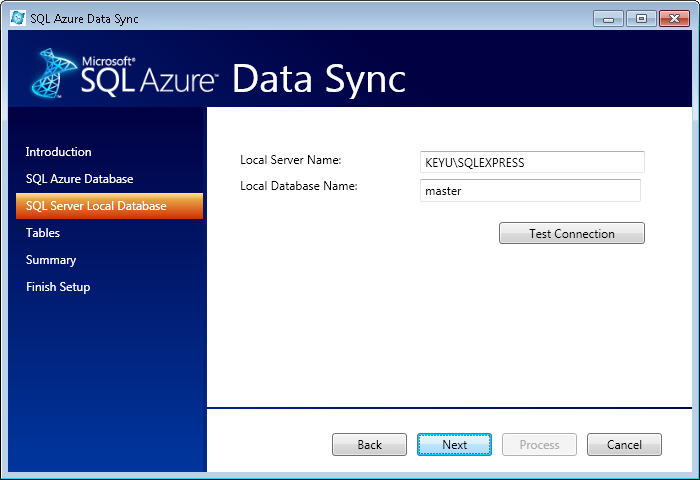
Click Next. On this screen, enter the name and credentials for the local database you want to use for syncing with the Microsoft Azure database.
Click Next. On the next page, select the tables that need to be synchronized. Also, select the database that will prevail in case of conflicts. Then click Next.
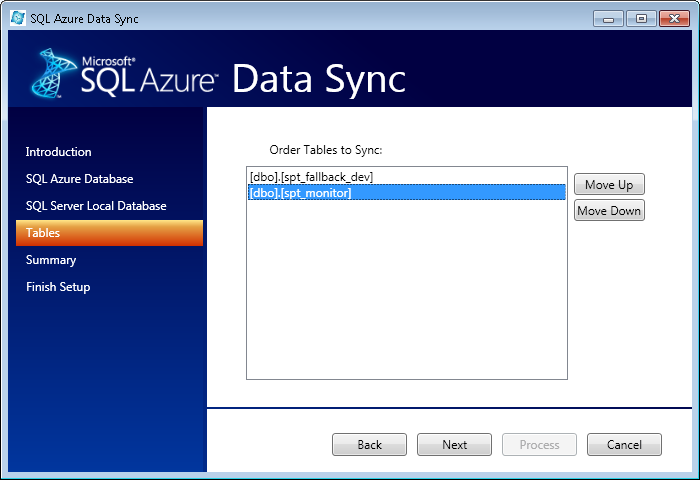
On the next screen, choose the table ordering.
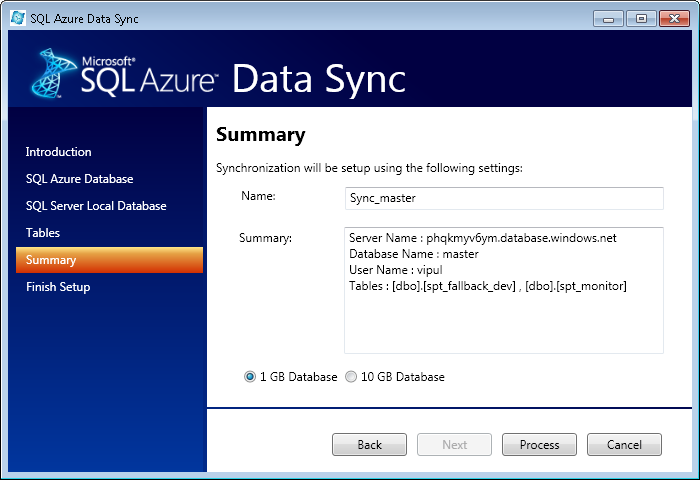
On the summary page, name your synchronization job and click Process.
Once you click Process, it will create a Job with the name specified which will be visible under SQL Server Management studio under “SQL Server Agent -> Jobs”. Whenever you want to synchronize your database, you now only need to run this job.
Using the SQL Azure Offline Plug in for Microsoft Visual Studio
Data Synchronization is also easier programmatically. If you have installed the tools mentioned above and you have Microsoft Visual Studio 2008 Professional, you will get a new item template called SqlAzureDataSyncClient. When it is added to a project, SqlAzureDataSyncClient automatically does the underlying plumbing and makes the necessary classes to facilitate data synchronization.
The steps are similar to the Data Sync tool. The only difference here is that when you add a new item “SQLAzureDataSyncClient“, a wizard pops up and asks a bunch of questions that captures the information, which is then used to create the classes and project references.
Conclusion
We saw how SQL Azure Data Sync tools work and what they are used for. I hope that this information will be useful when you are working to synchronize your data between Azure Database and your local SQL Server database. Happy Syncing!
Related Articles
Free Microsoft Azure SQL Tools For Cloud Application Development
Microsoft Azure cloud database (SQL Azure) pricing tweaked
Get Started with SQL for Cloud Computing: Microsoft SQL Data Services


